To create a Single Sign-On on AWS follow the steps below:
AZURE
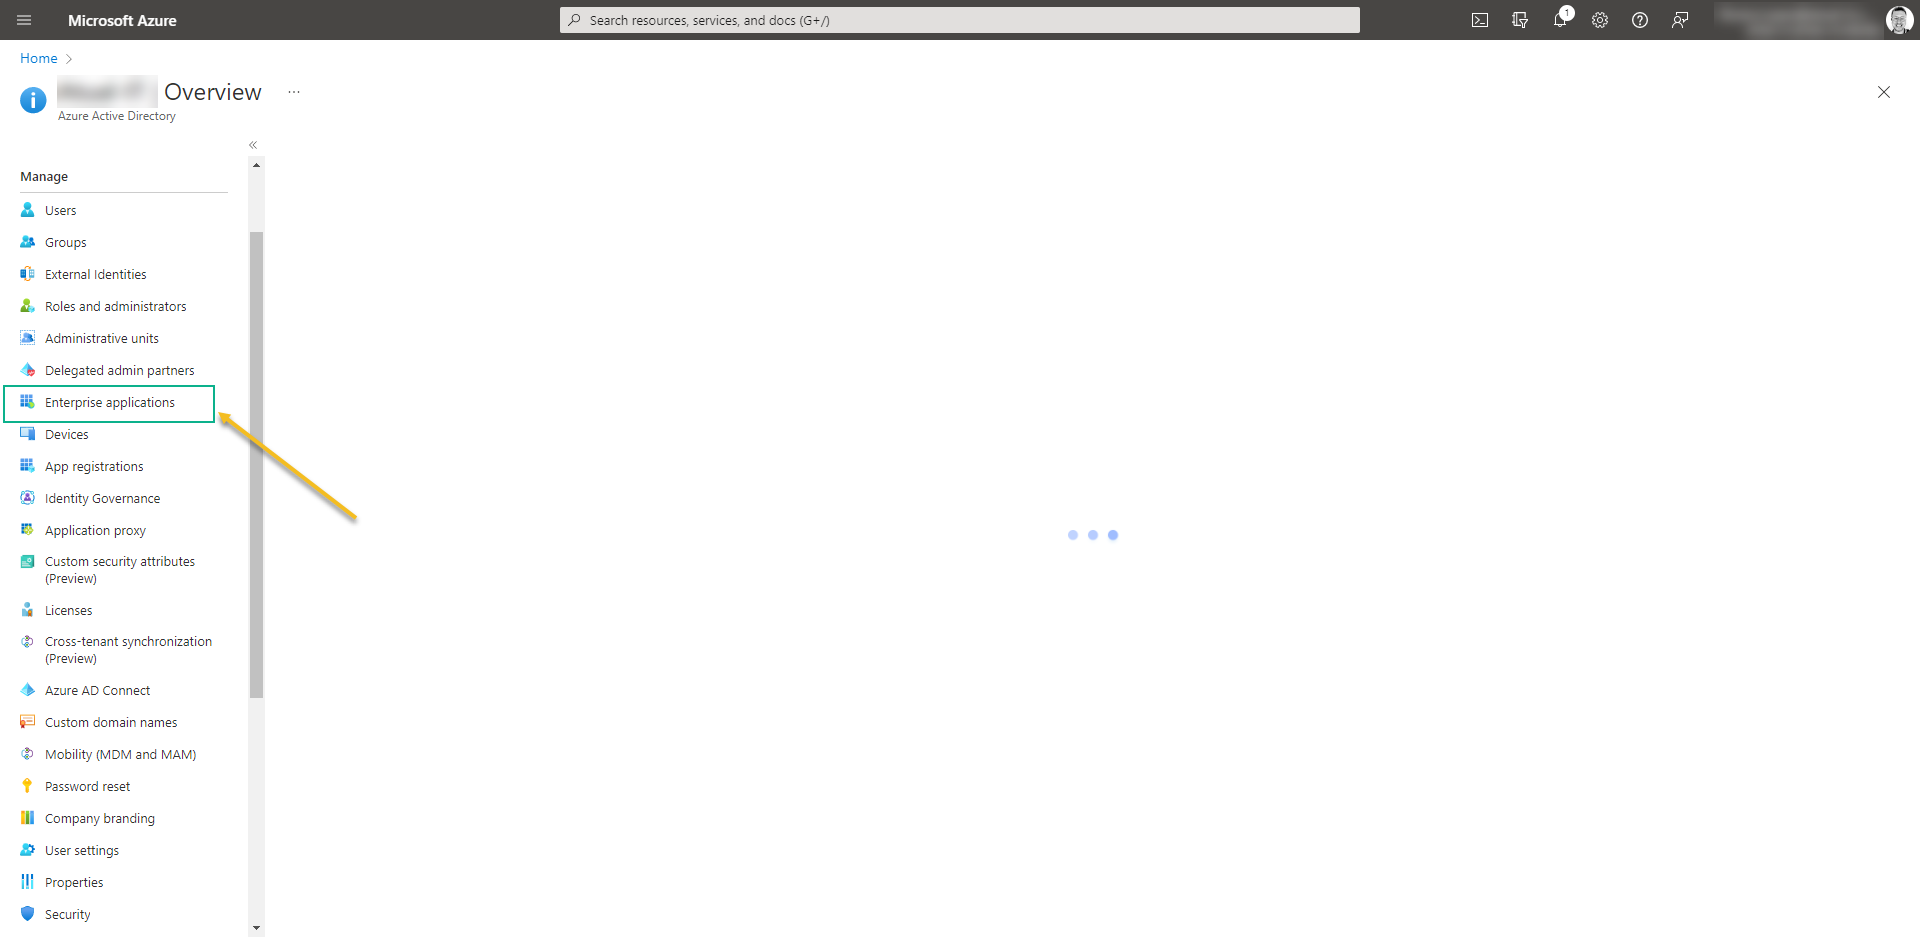
- Open Azure Active Directory: https://aad.portal.azure.com and enter on Enterprise application:

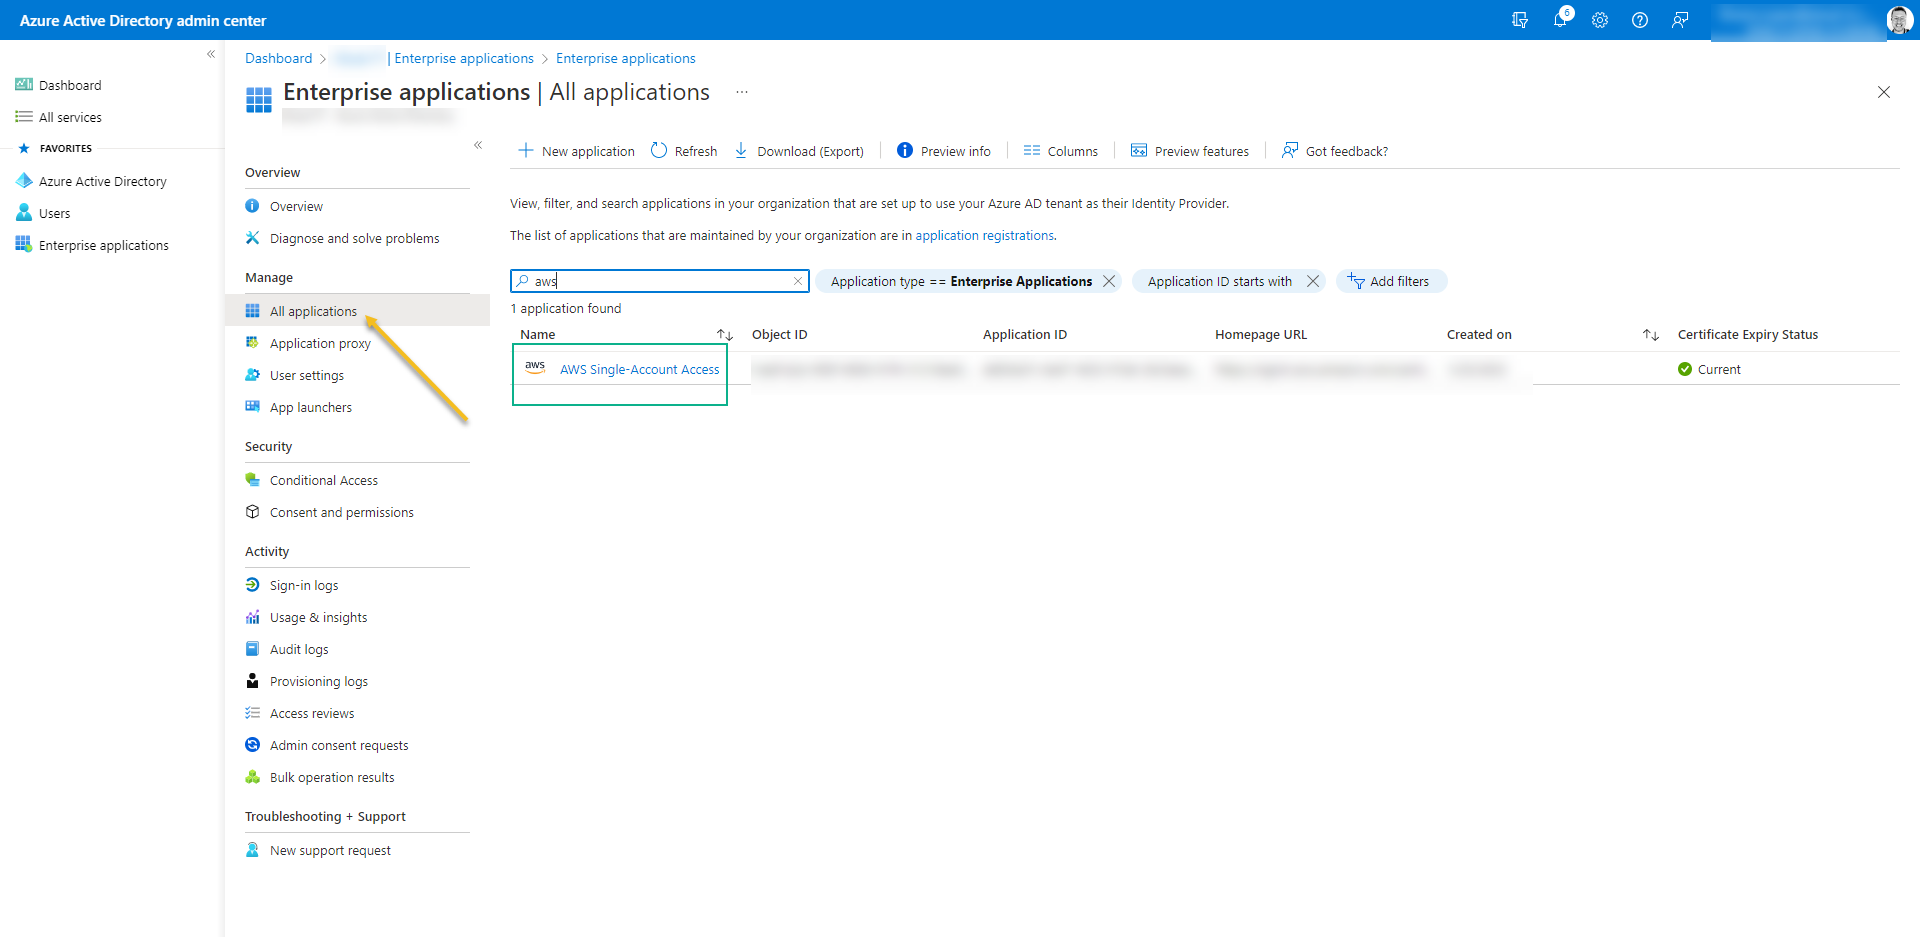
- Click on “New application” search for AWS Single-Account Access and then click on “Create“
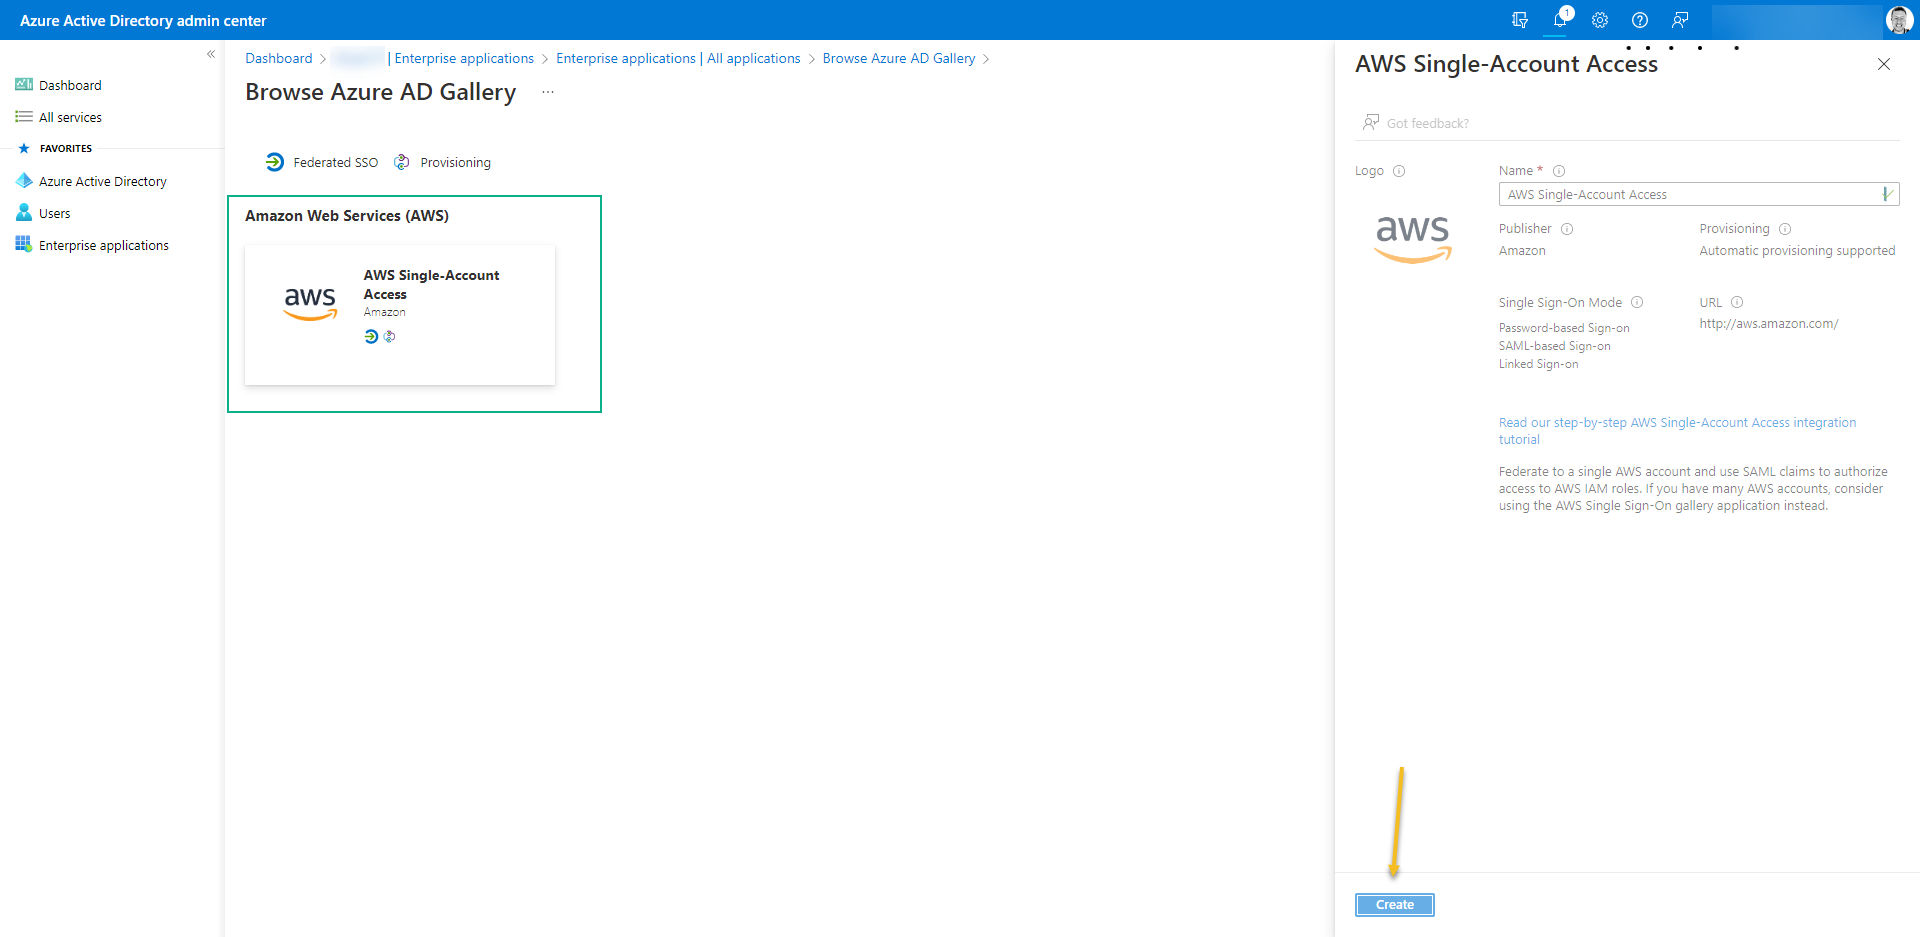
- Once it´s done, access the new application

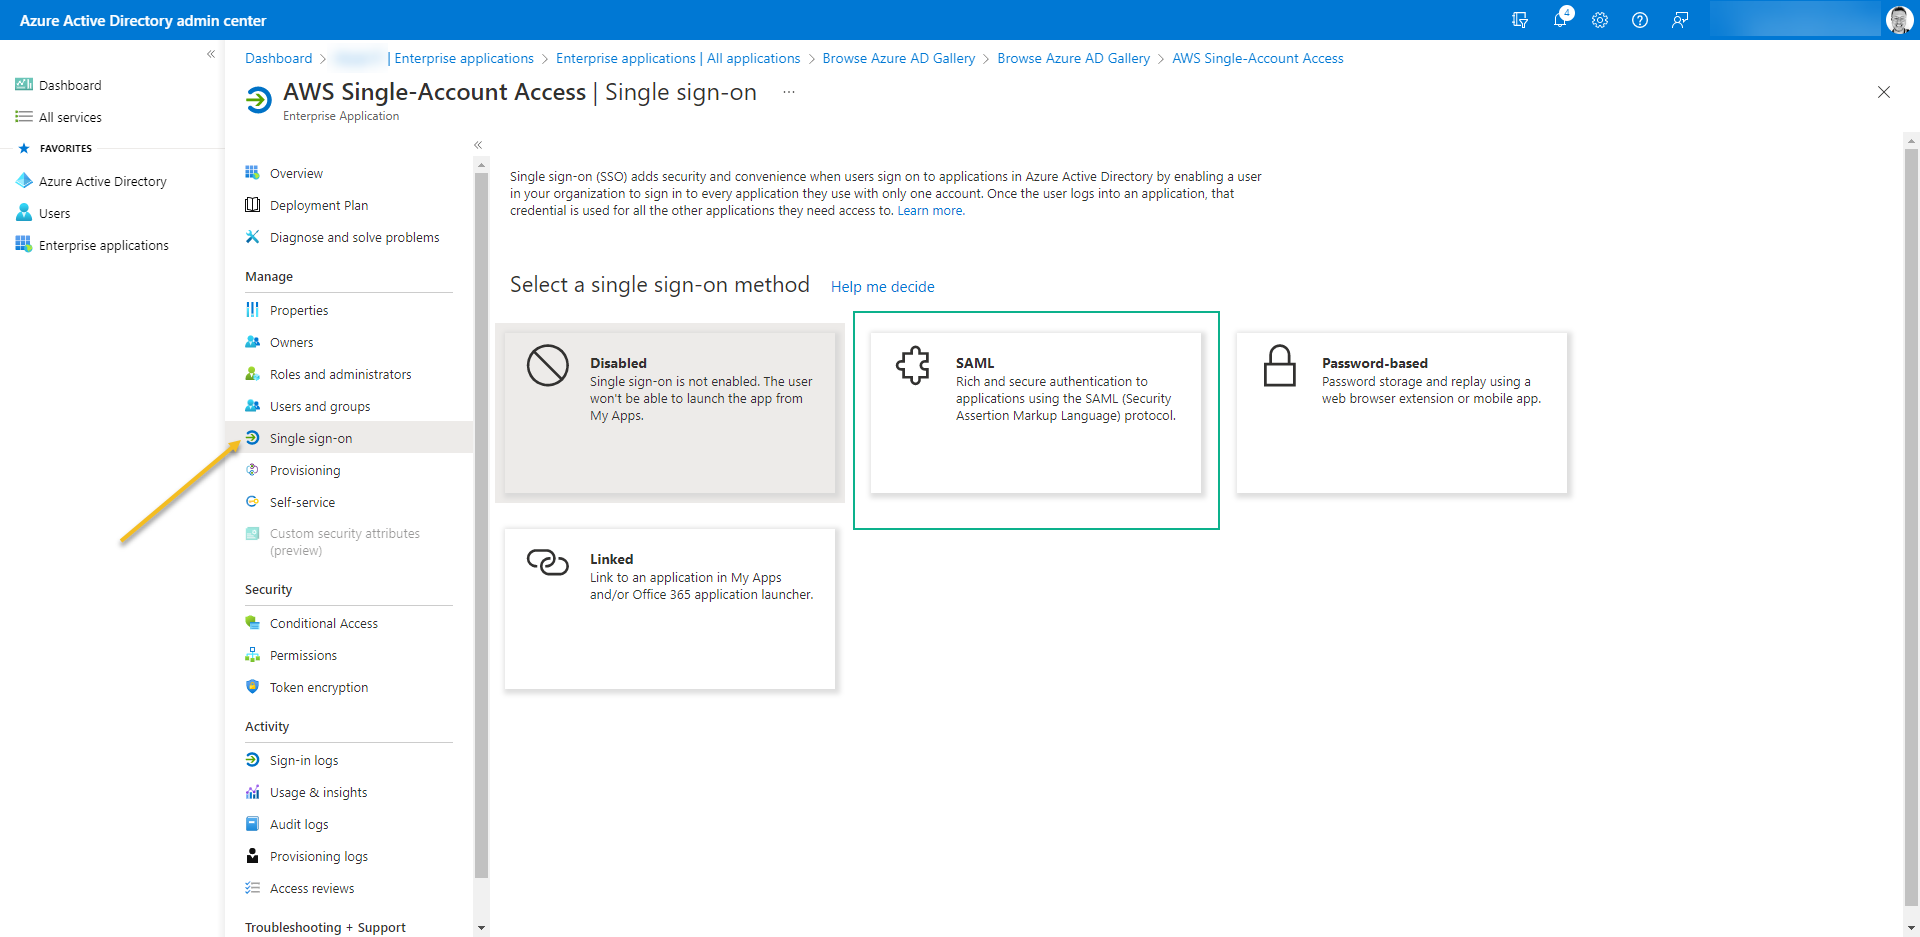
- Click on the left menu, access “Single Sign-on” and select the SSO method to SAML
- As soon SAML is open you will receive a notification “Save single sign-on setting“. Click on Yes.
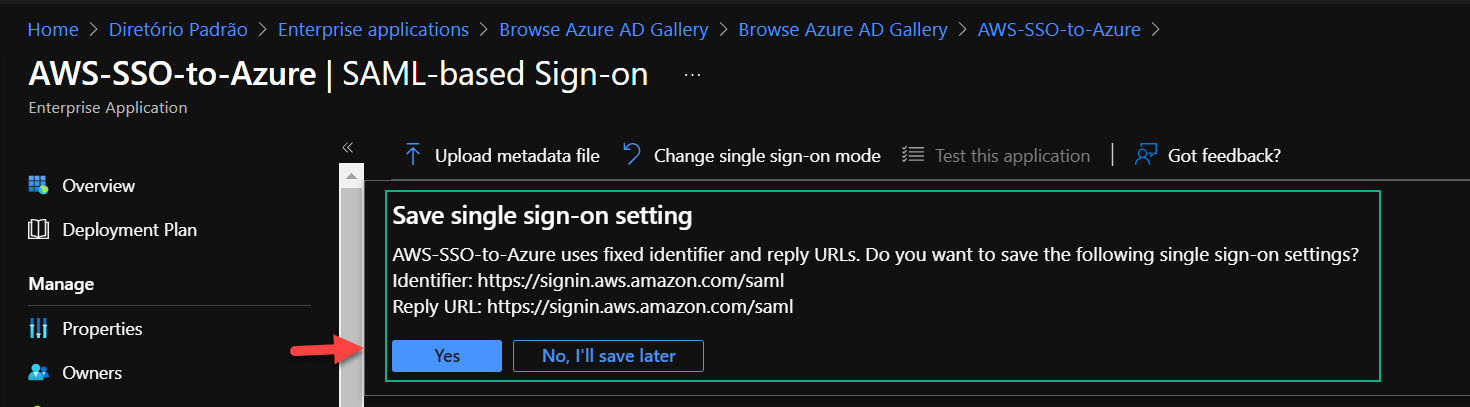
After the warning of save successfully, refresh the page… It will display the Identifier and Reply URL correctly.
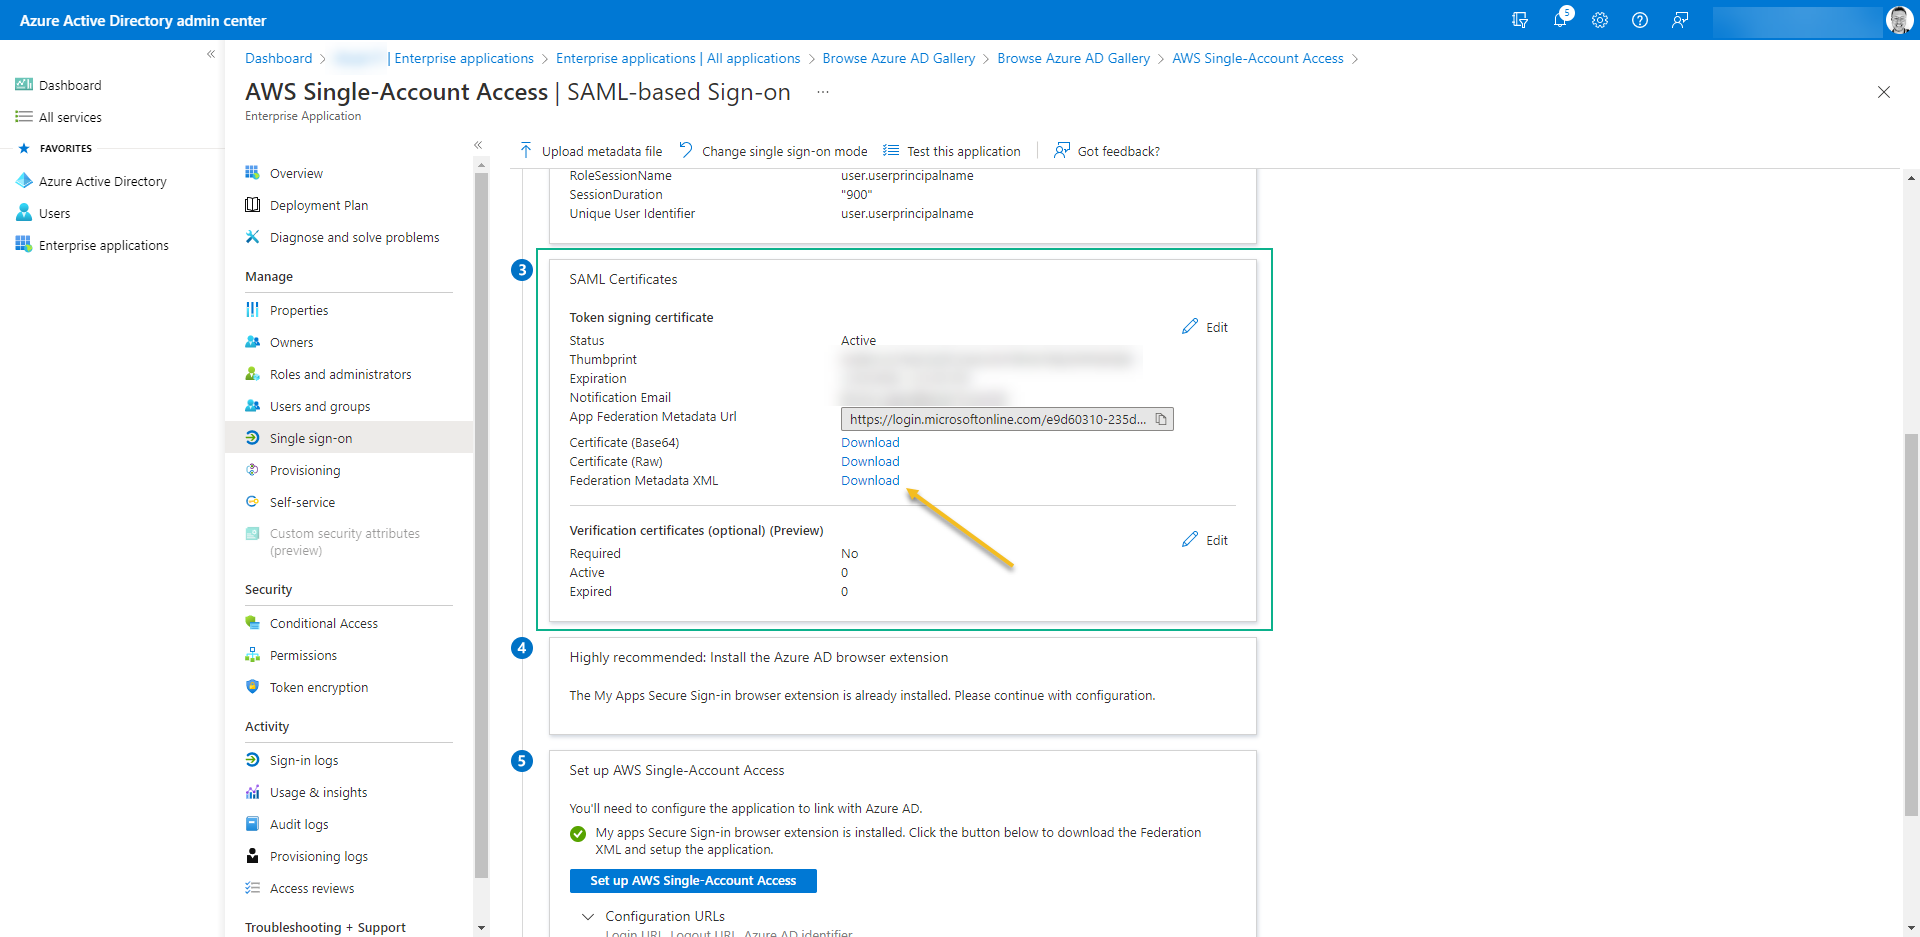
- Scroll down to step 03 and download Federation Metadata XML. We´ll use it on AWS. Don´t forget to double-check the notification email.
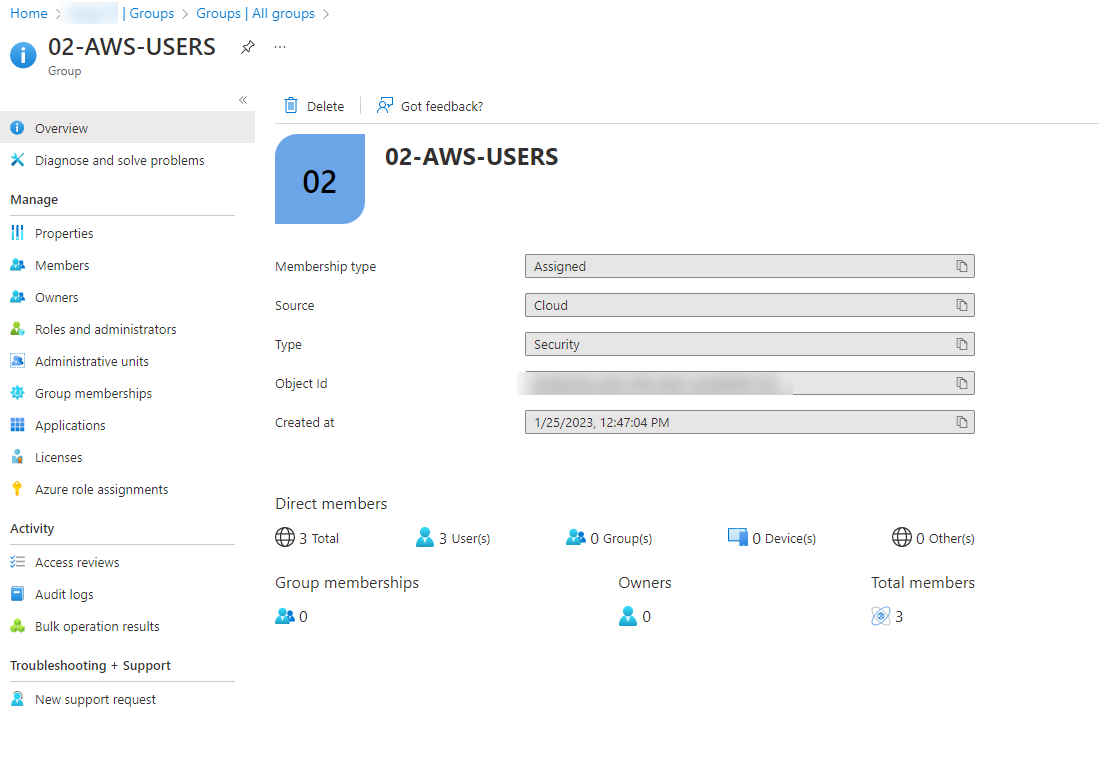
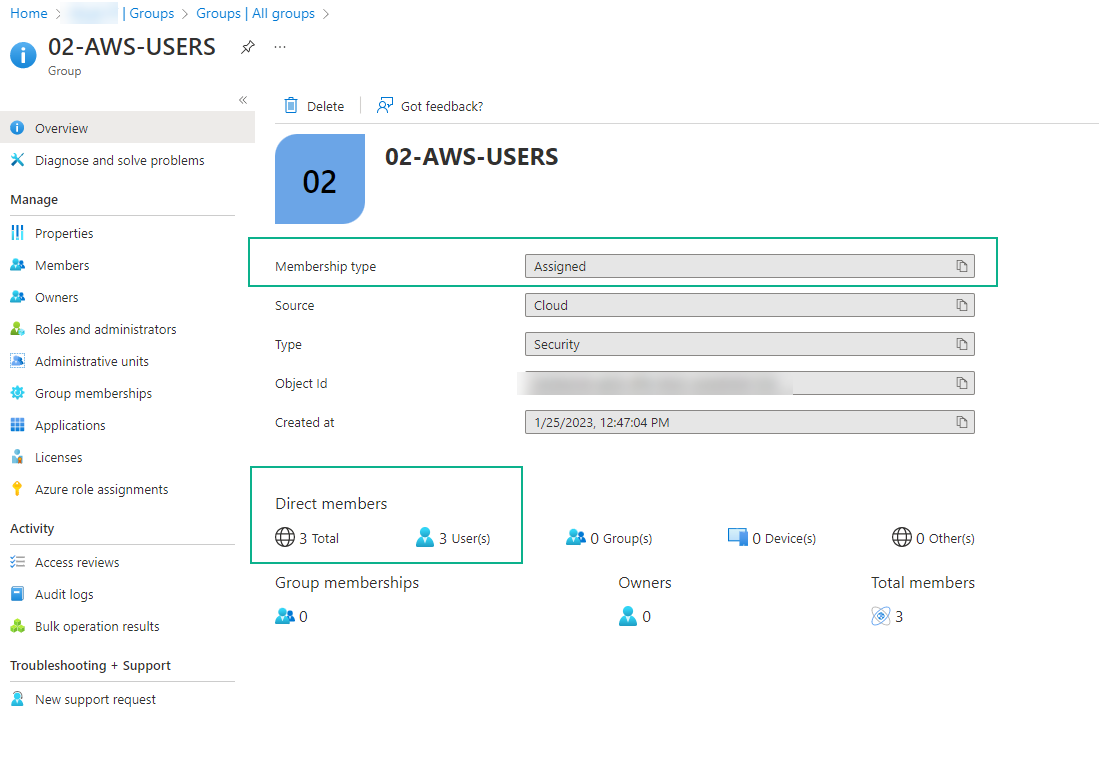
- Go back to AAD, and create an assigned security group. Assign the users to it and take note of the name of the group because we´ll use it with SSO on AWS.
AWS
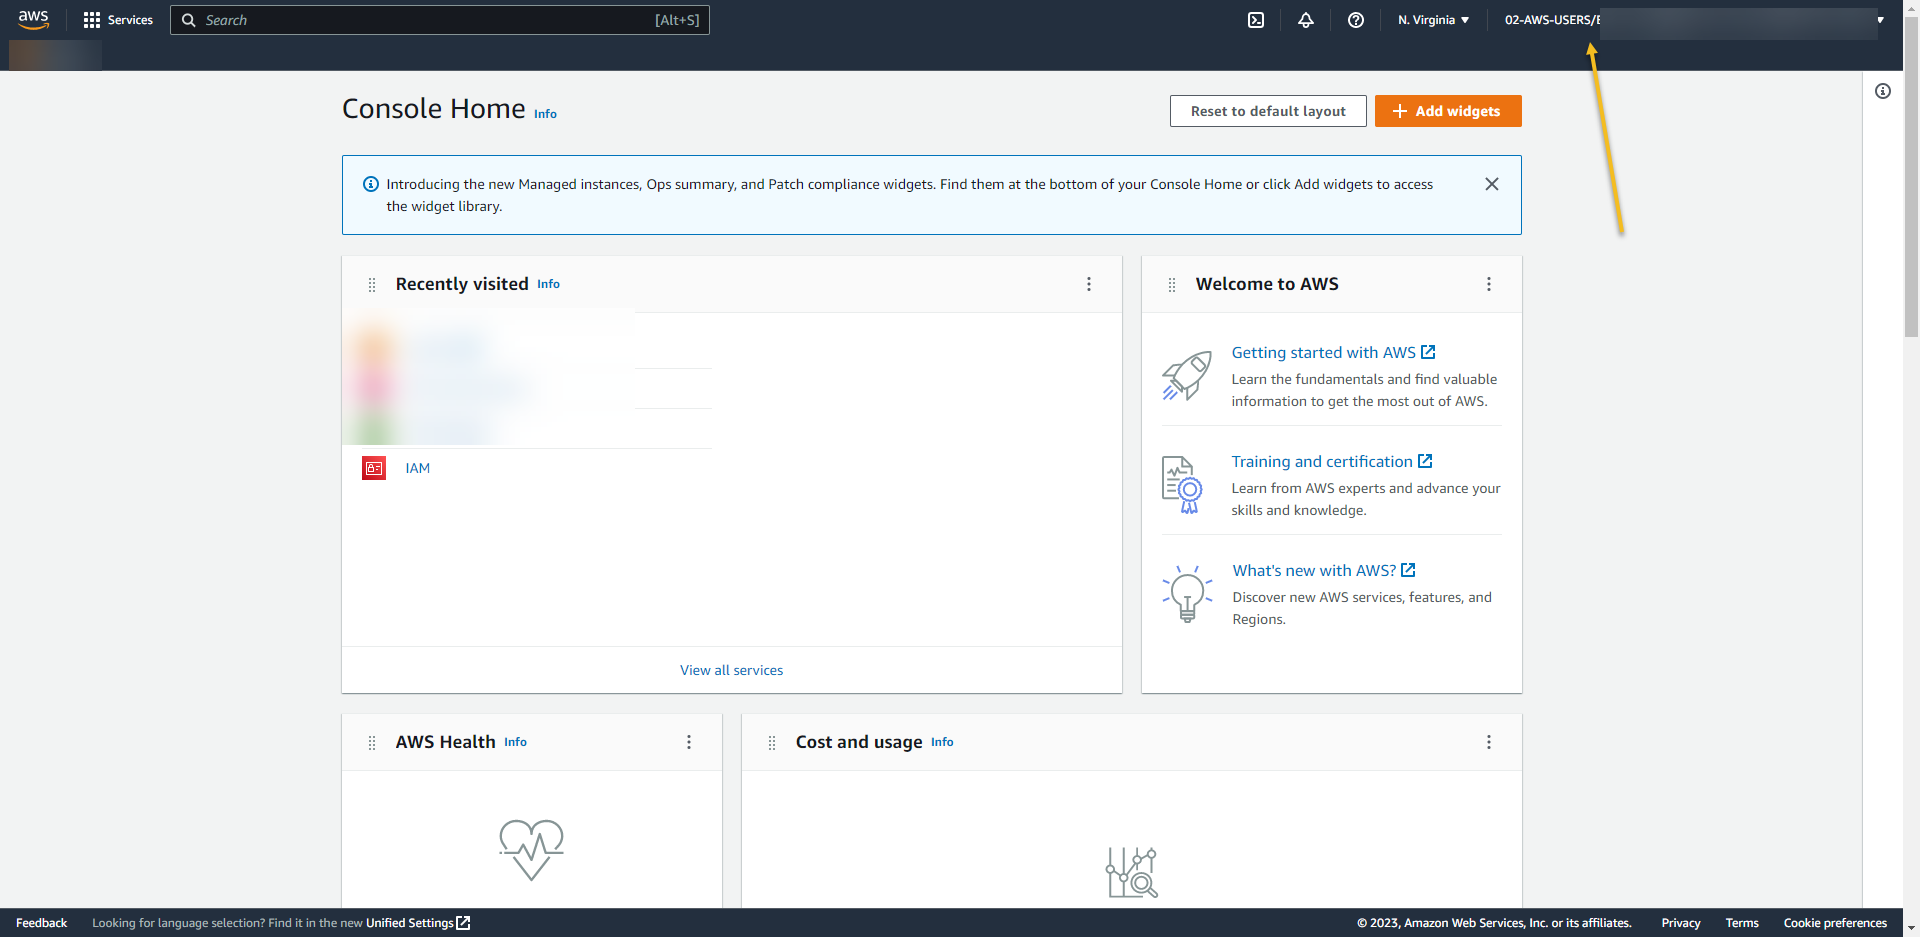
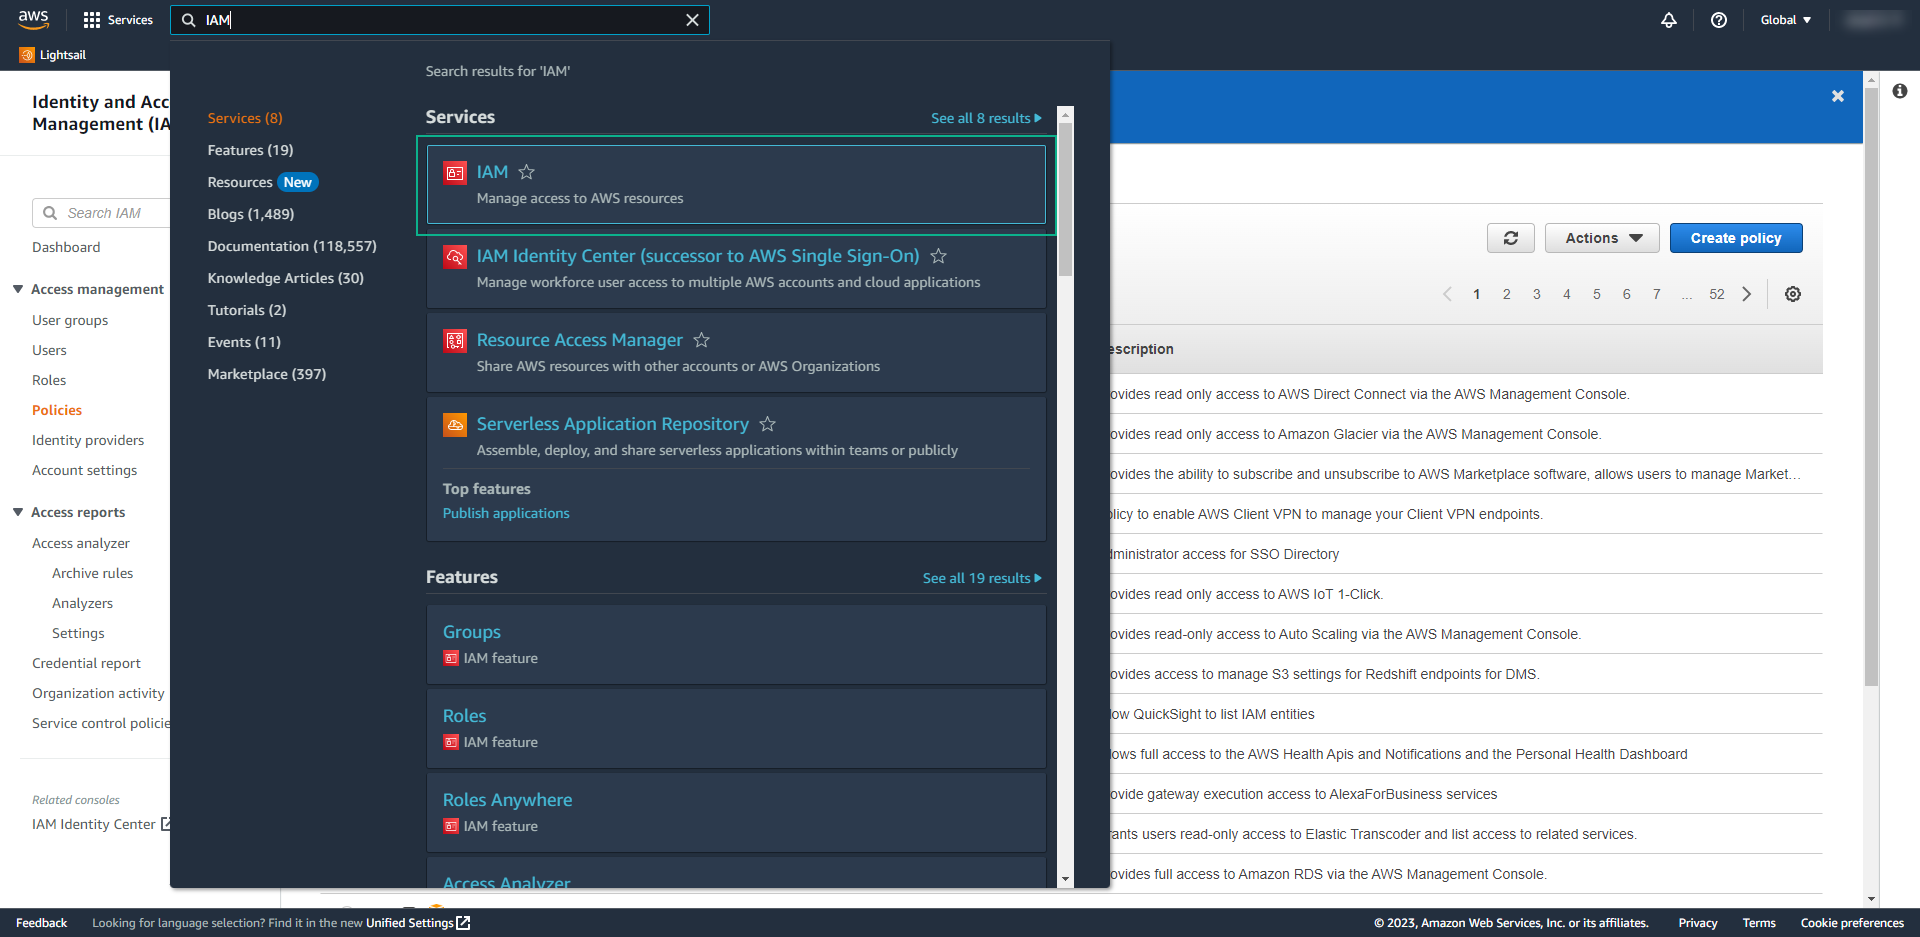
- It´s time to setup the AWS. Open the AWS console with your ROOT ACCOUNT https://aws.amazon.com/
- Once you are in, search for IAM
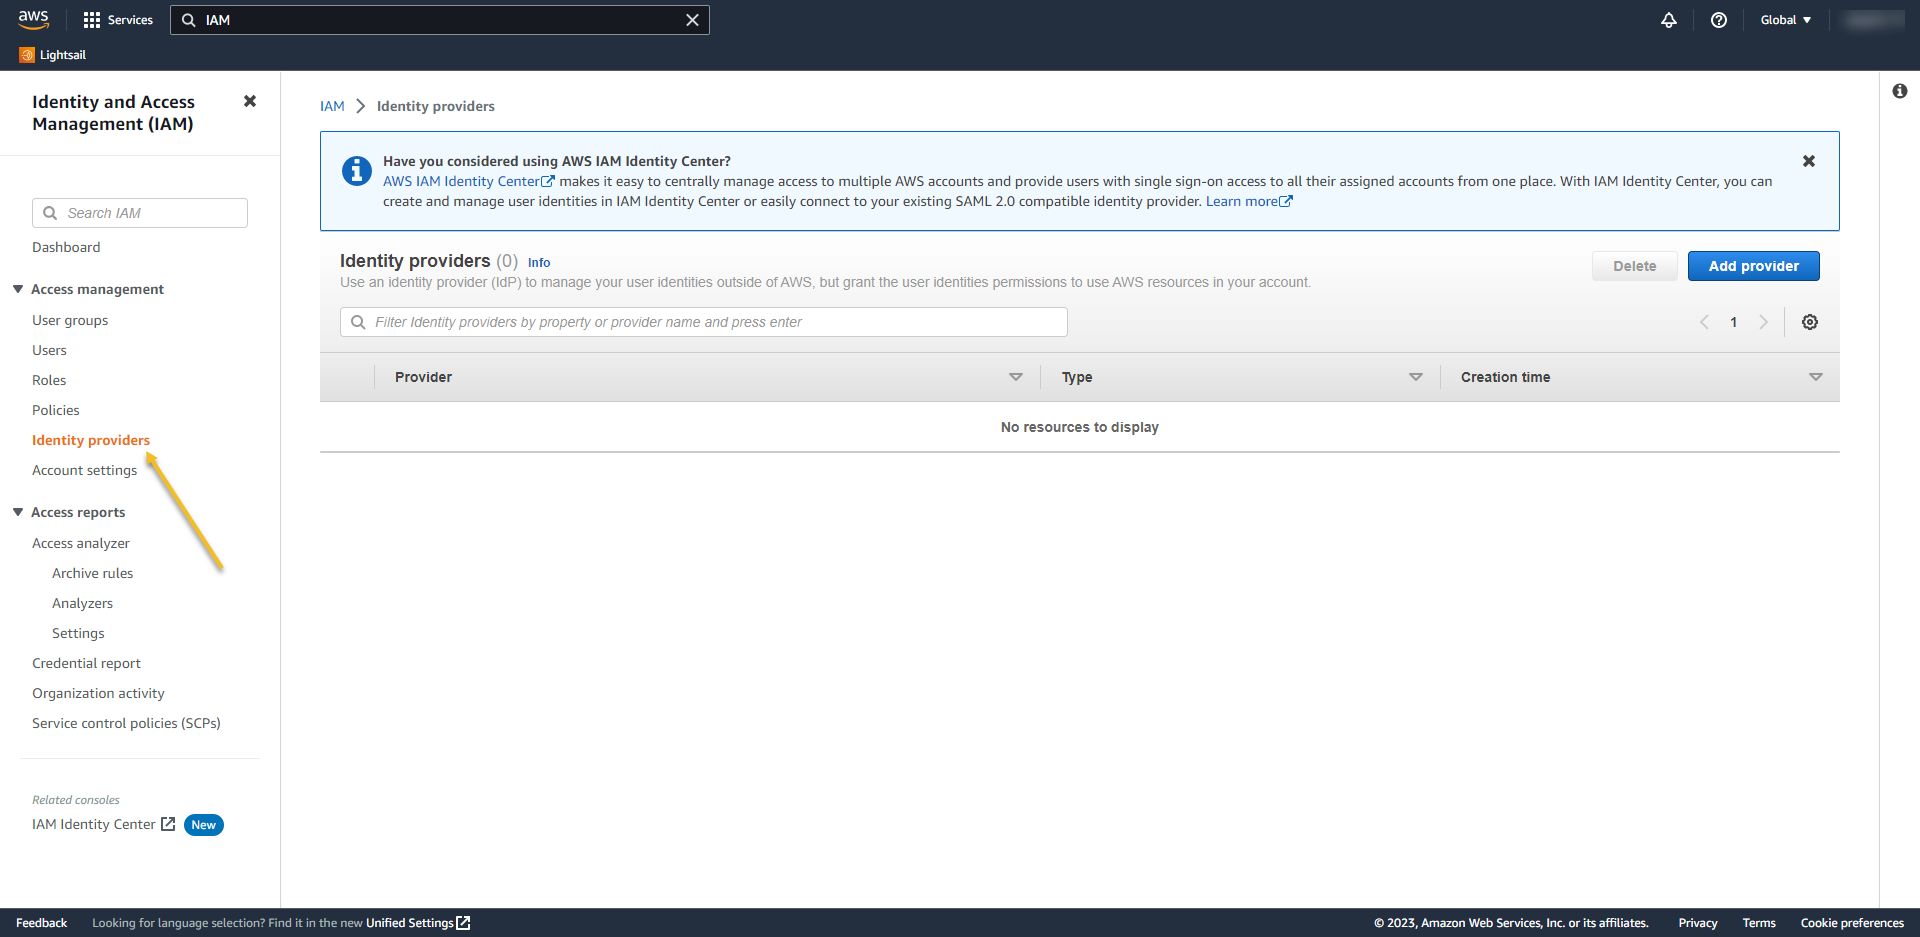
- On left panel, open Identity providers
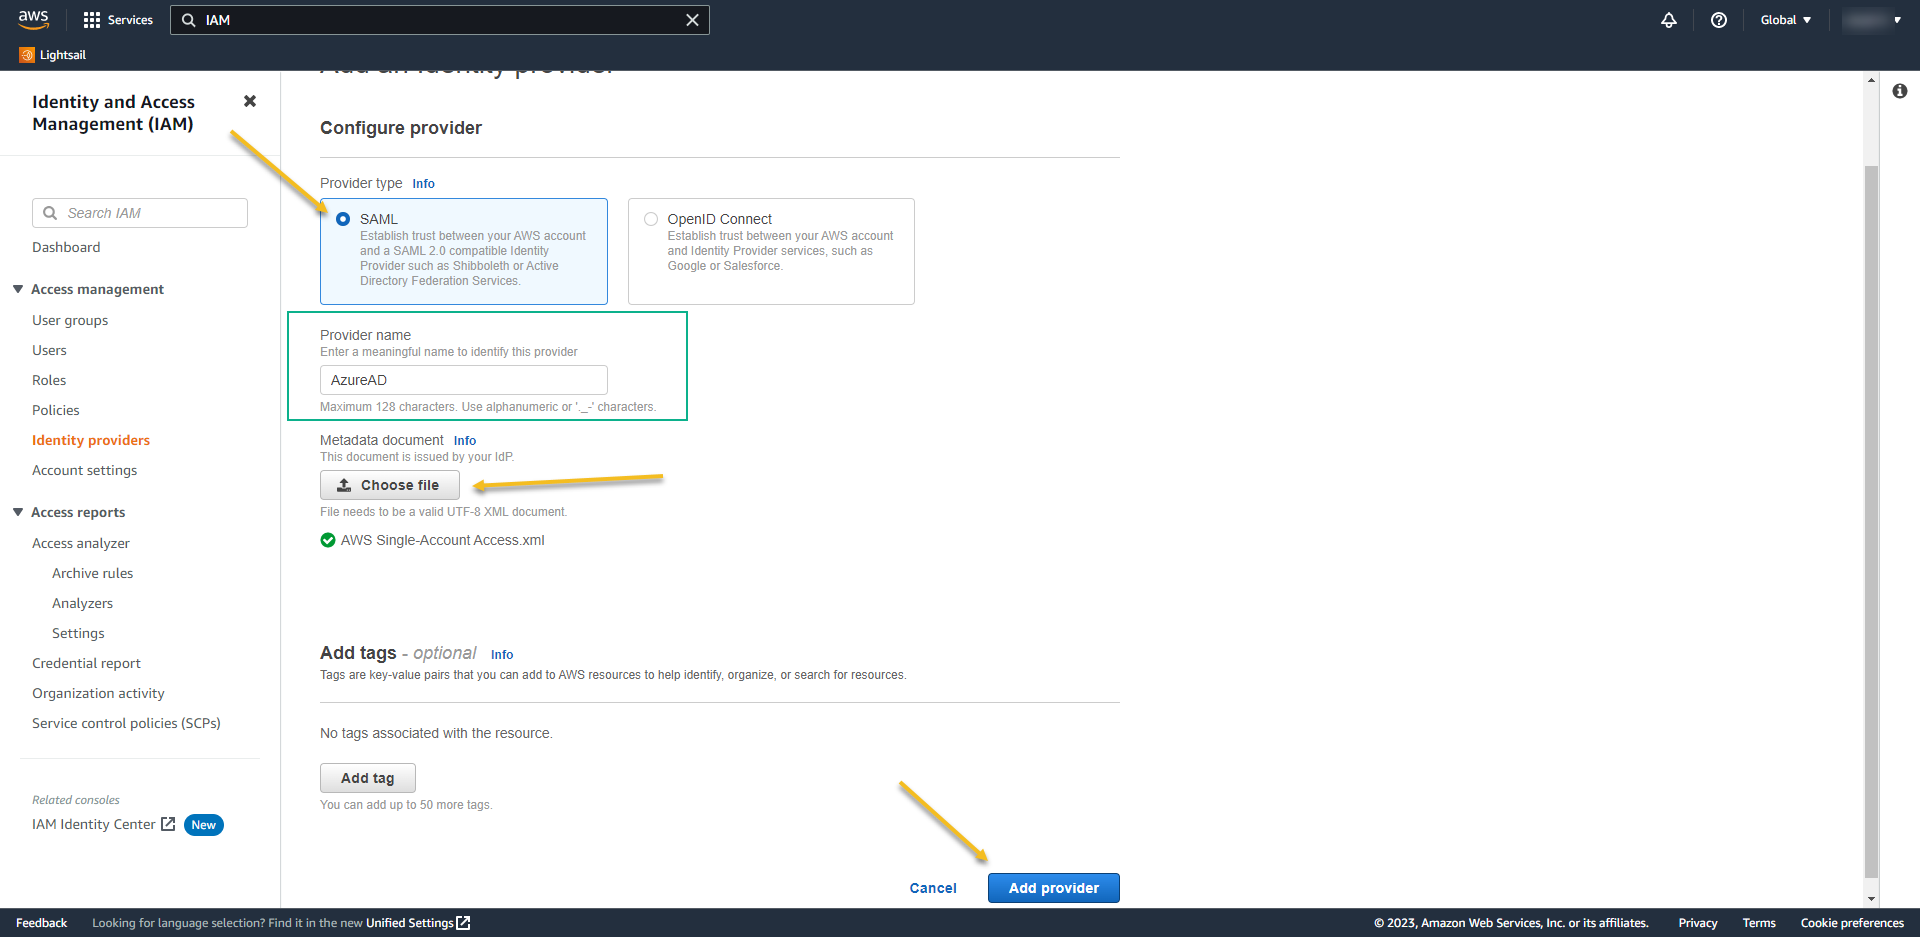
- Select on provider type select SAML,
- Give a name for your Provider – in my case, I called AzureAD
- From the Metadata document, choose the XML that you download from Azure
- and then click on Add Provider
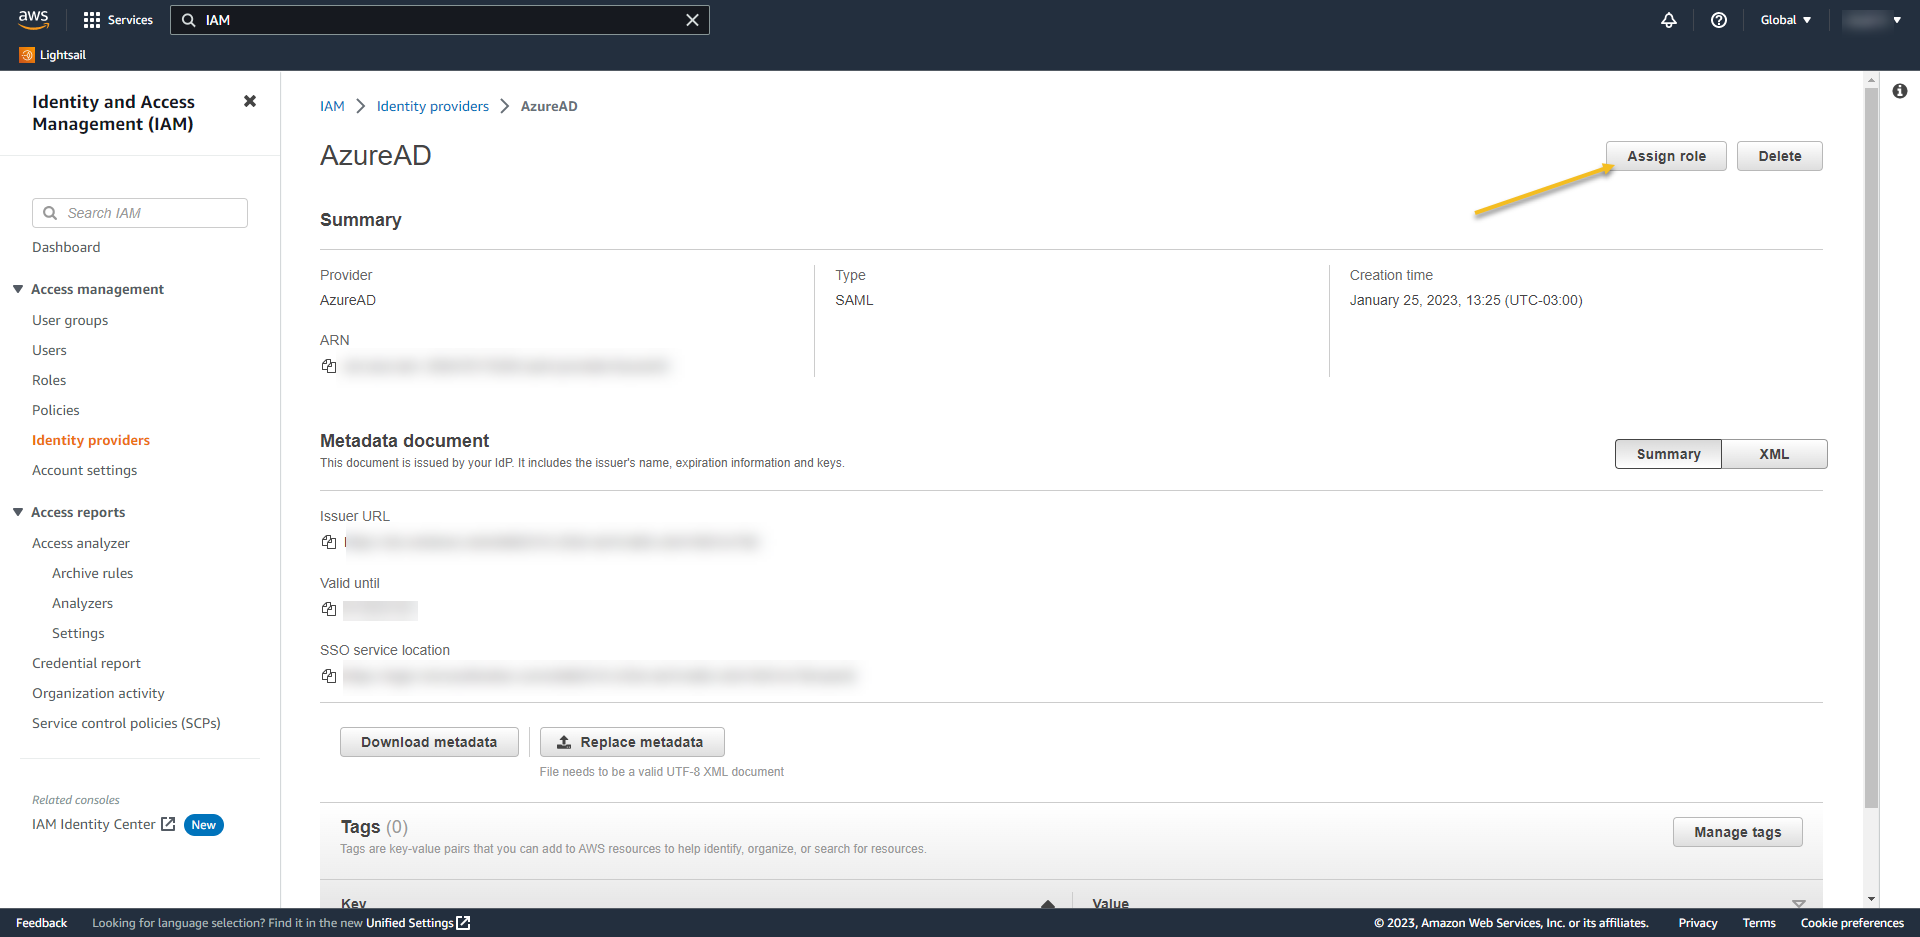
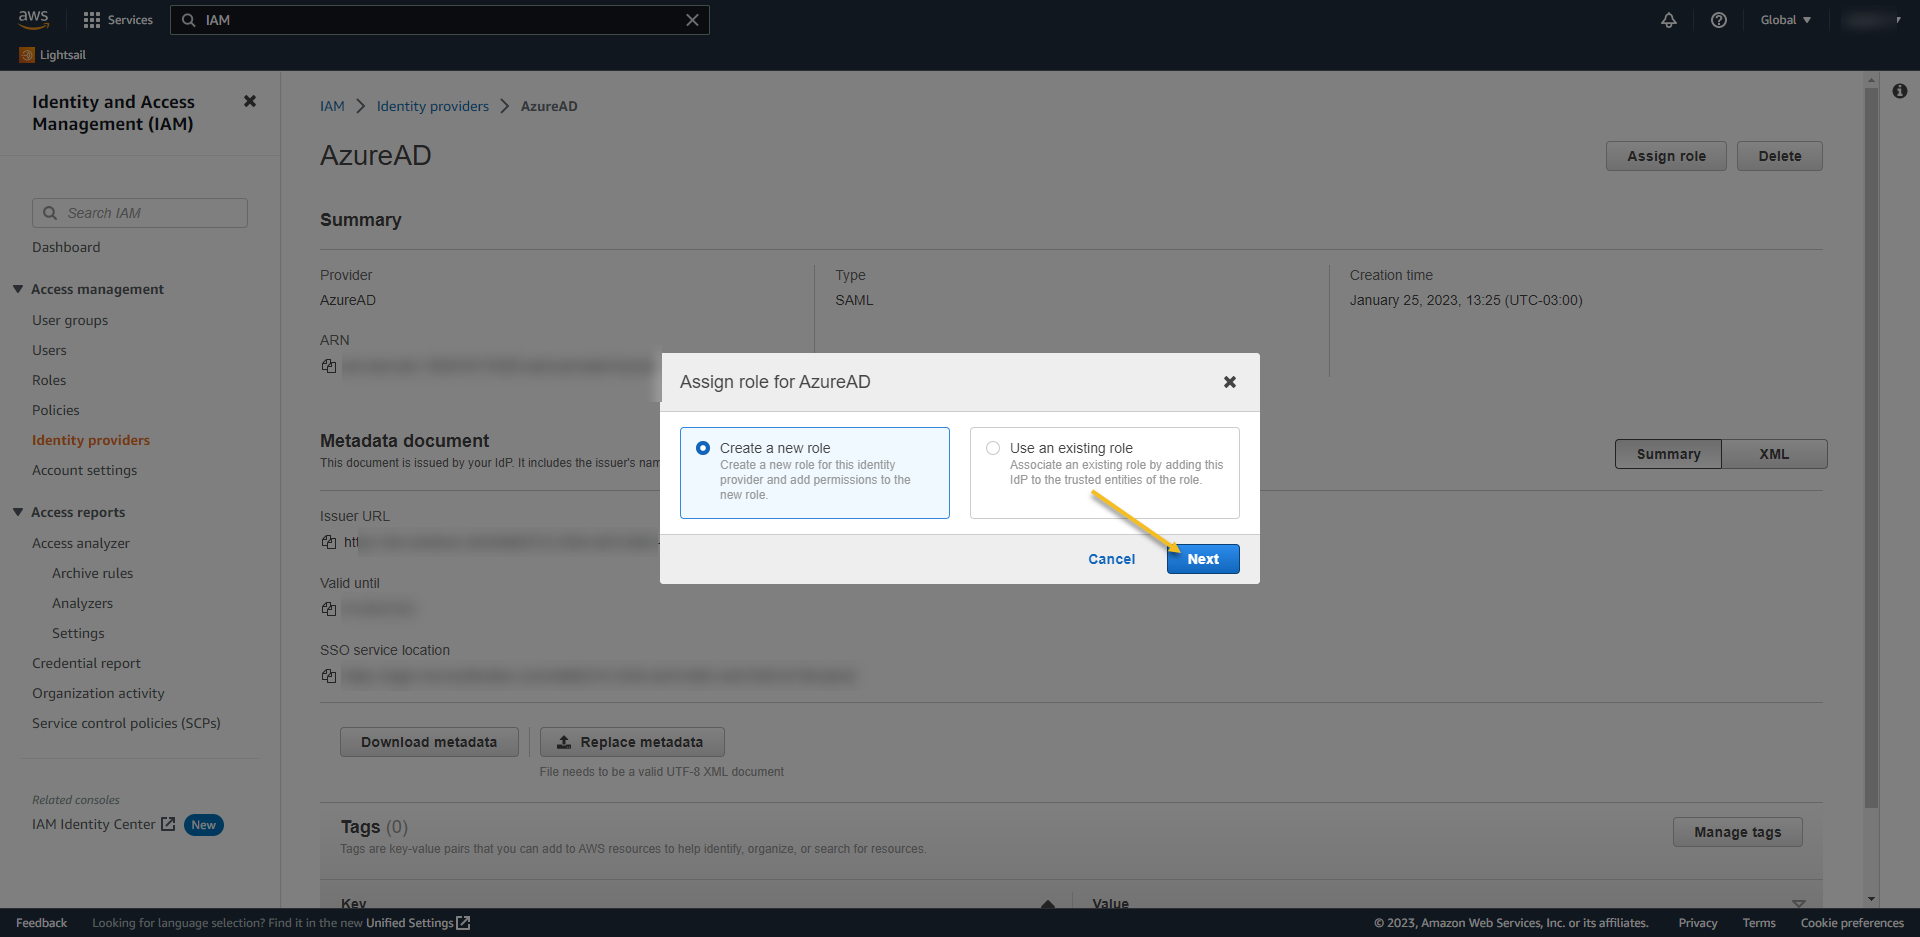
- Access again the provider. Now we´ll add the IAM role to it.
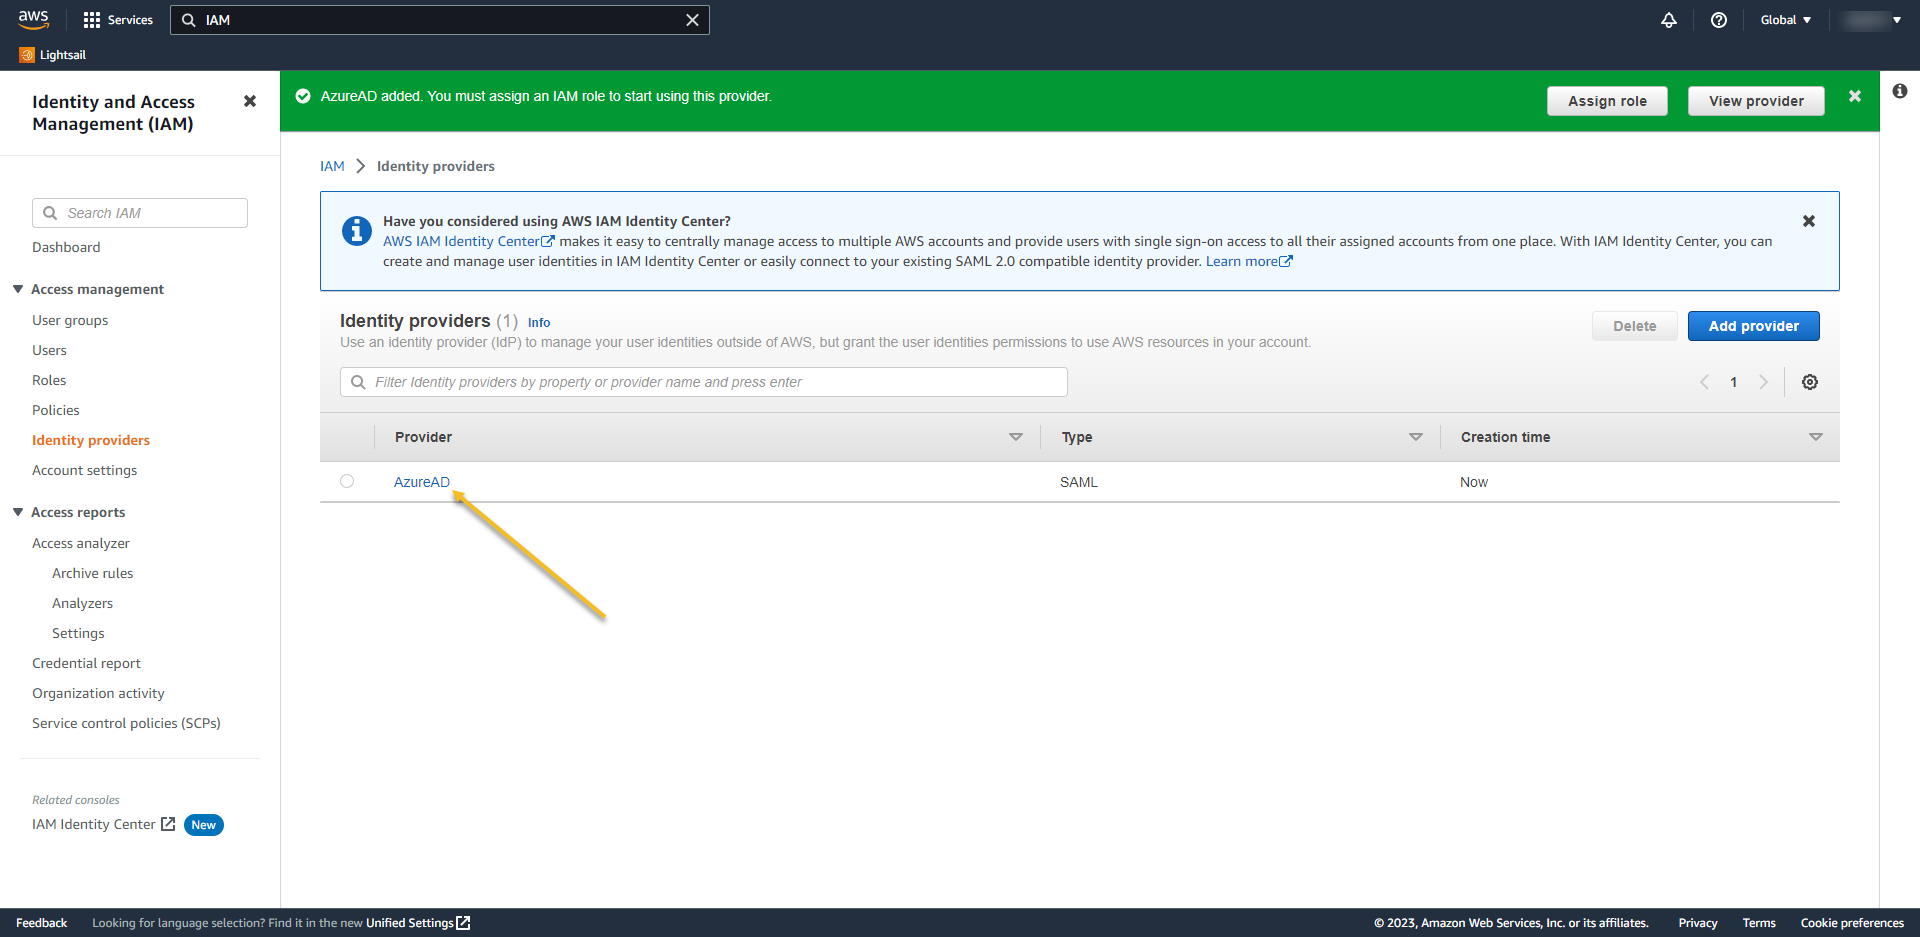
- Click on Assign role
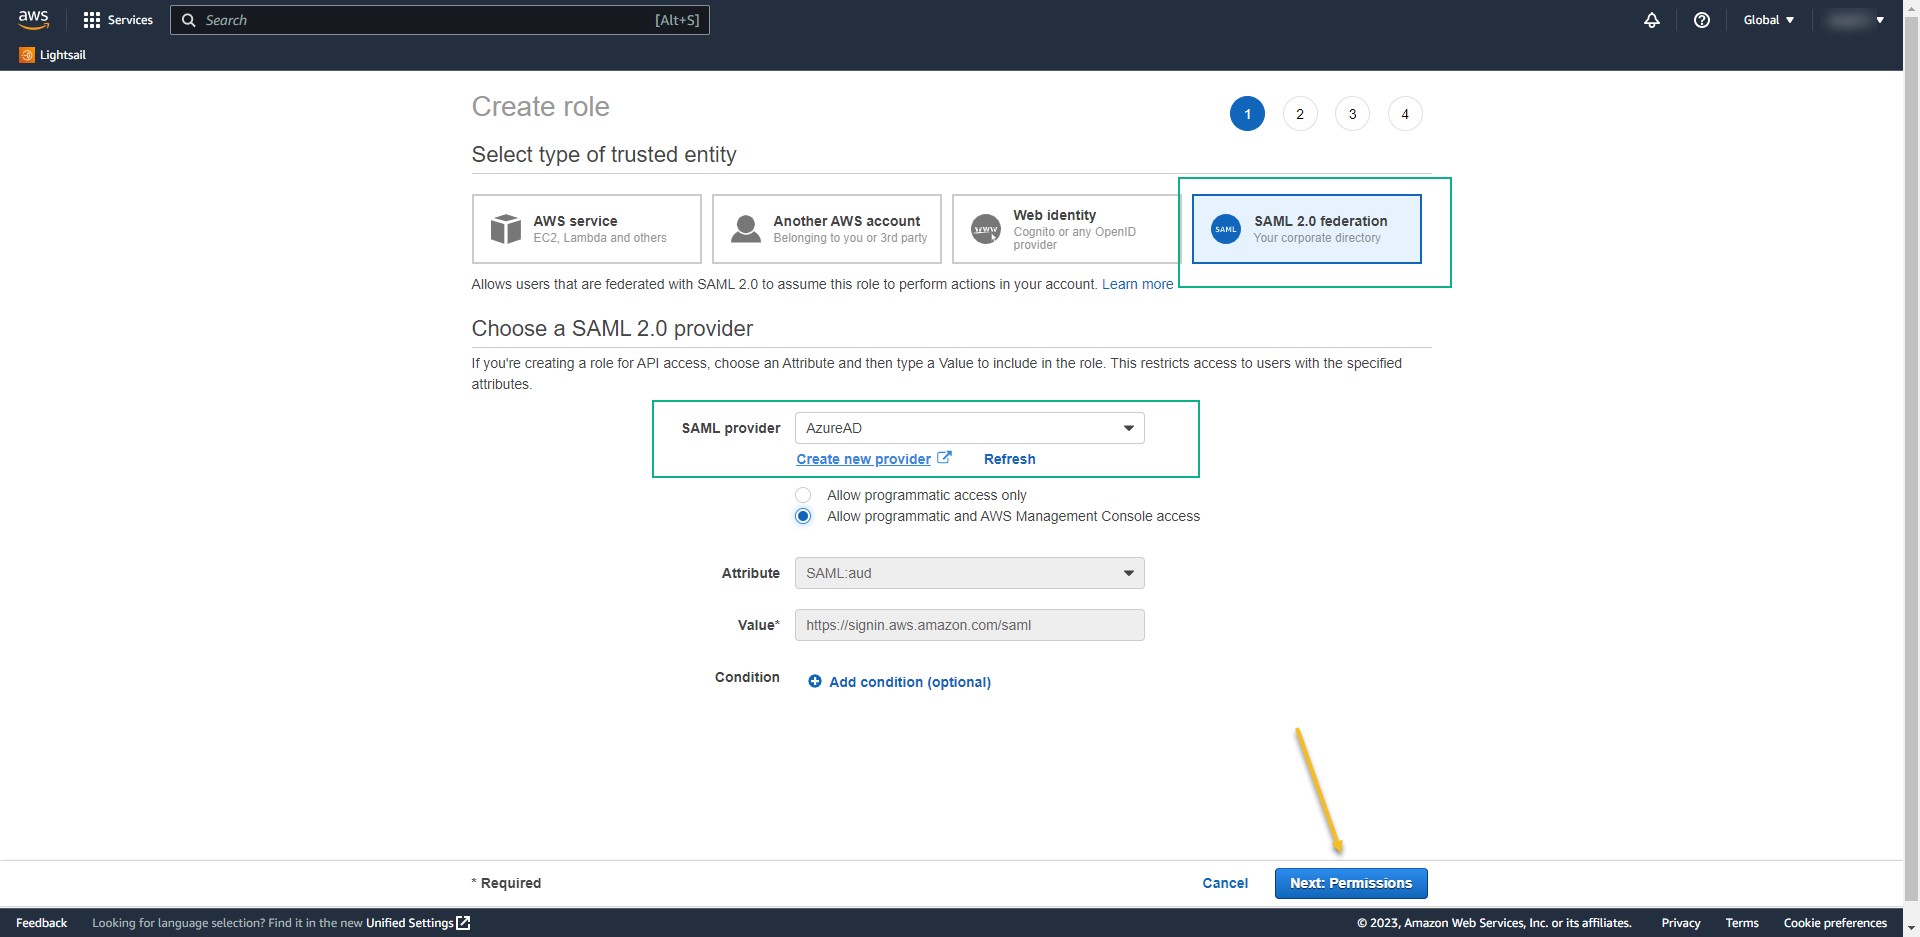
- Create a new role – > NEXT
- Select SAM 2.0 Federation
- SAML Provider -> select the name of the Provider – in my case AzureAD
- Check “Allow programmatic and AWS Management Console Access“
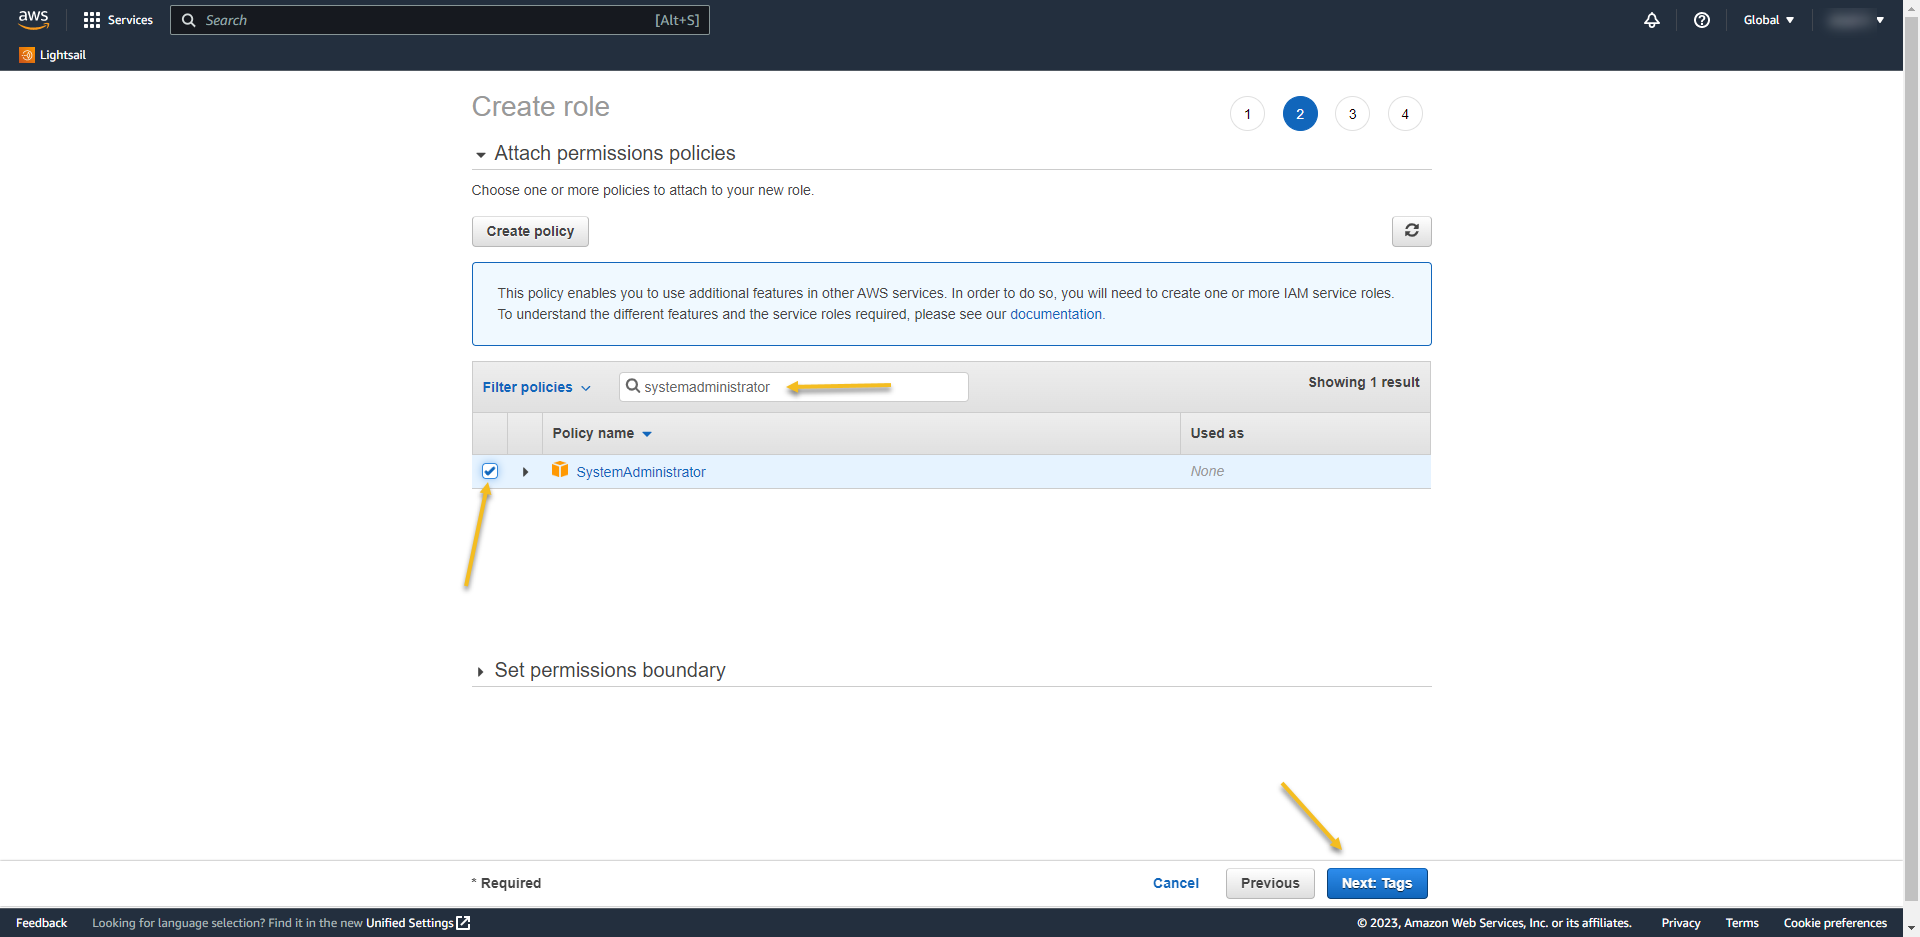
- On the next page search for the permission that you want to assign to users when they log in. I used the system administrator here.
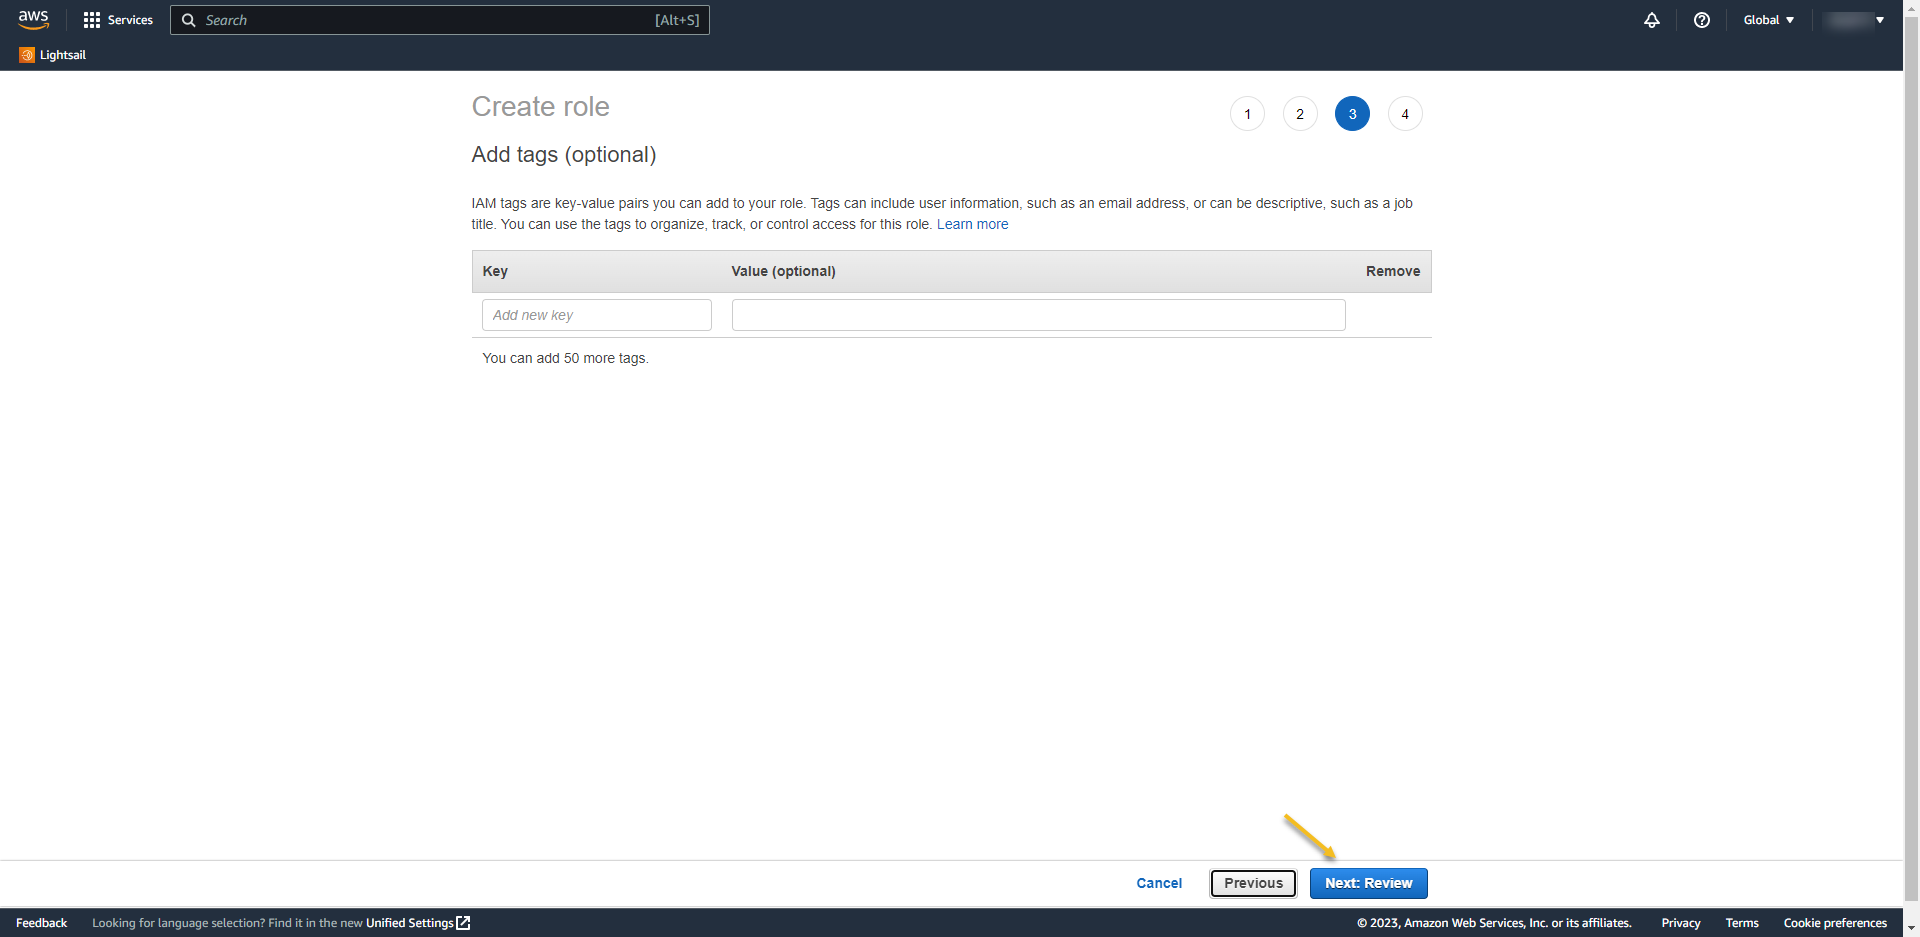
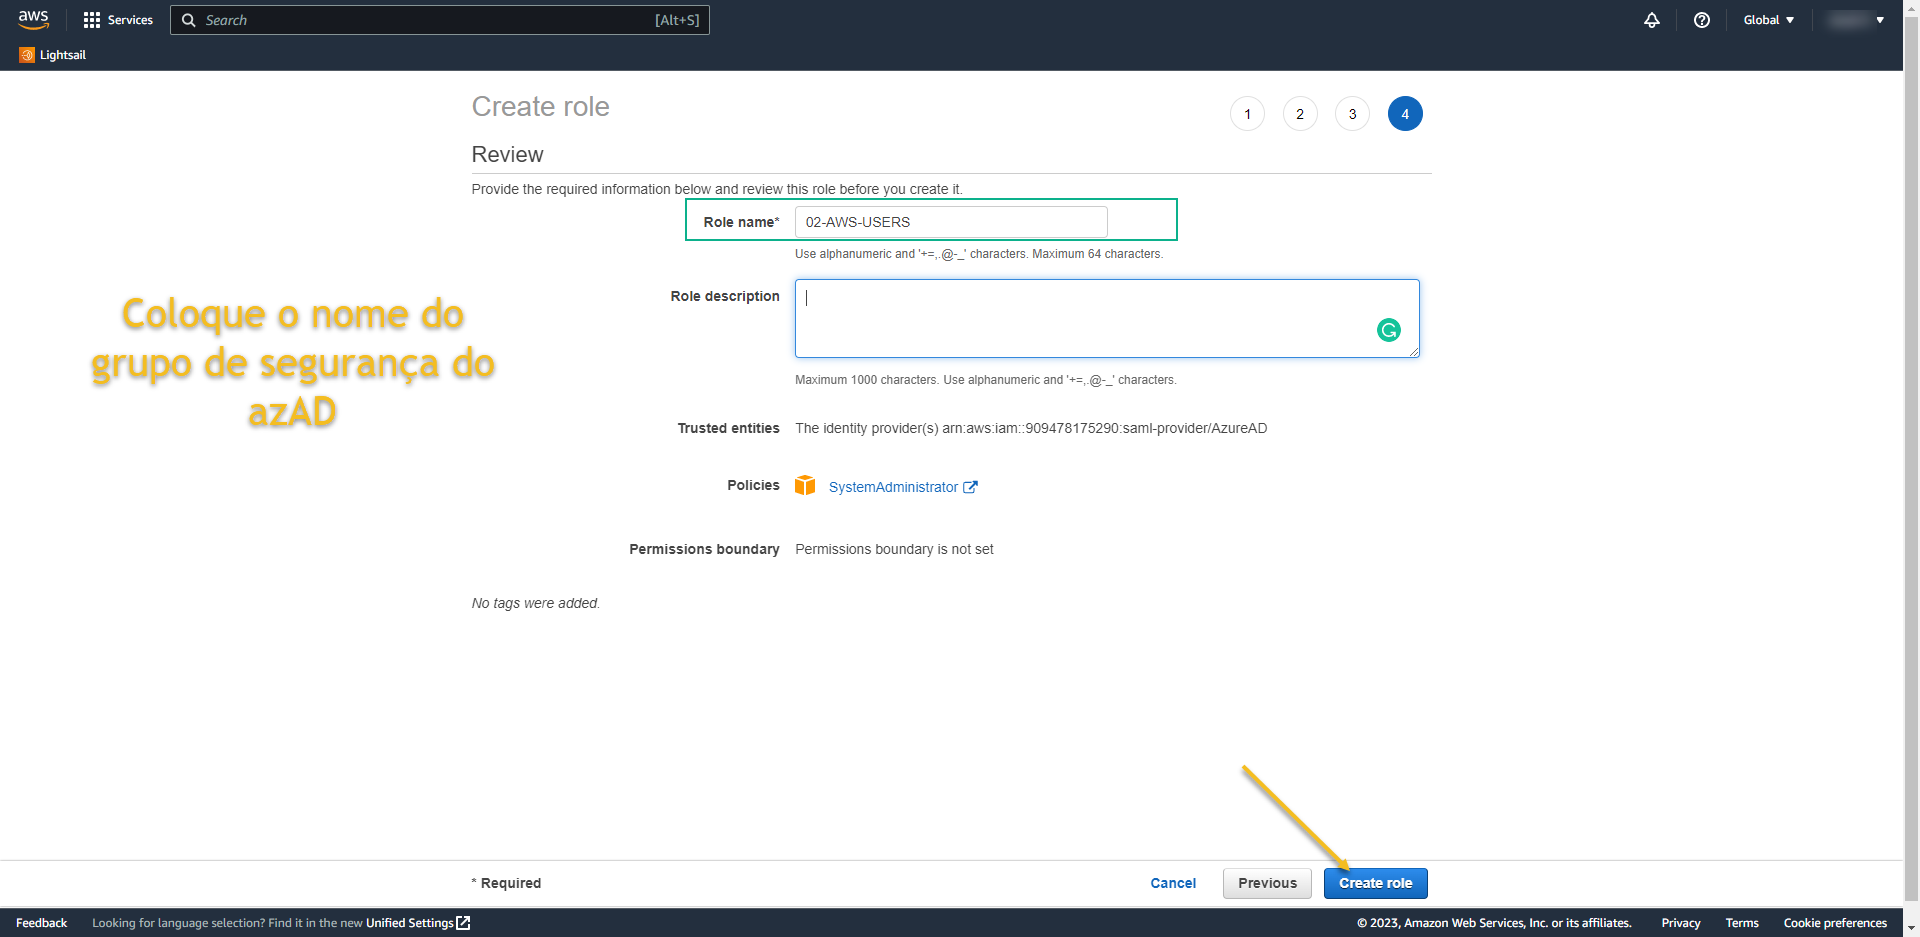
- At review page, write the role name
- Role name: THE-NAME-OF-GROUP-ON-AZURE-AD
- REMEMBER: If you don´t do it this way it won’t going to work…
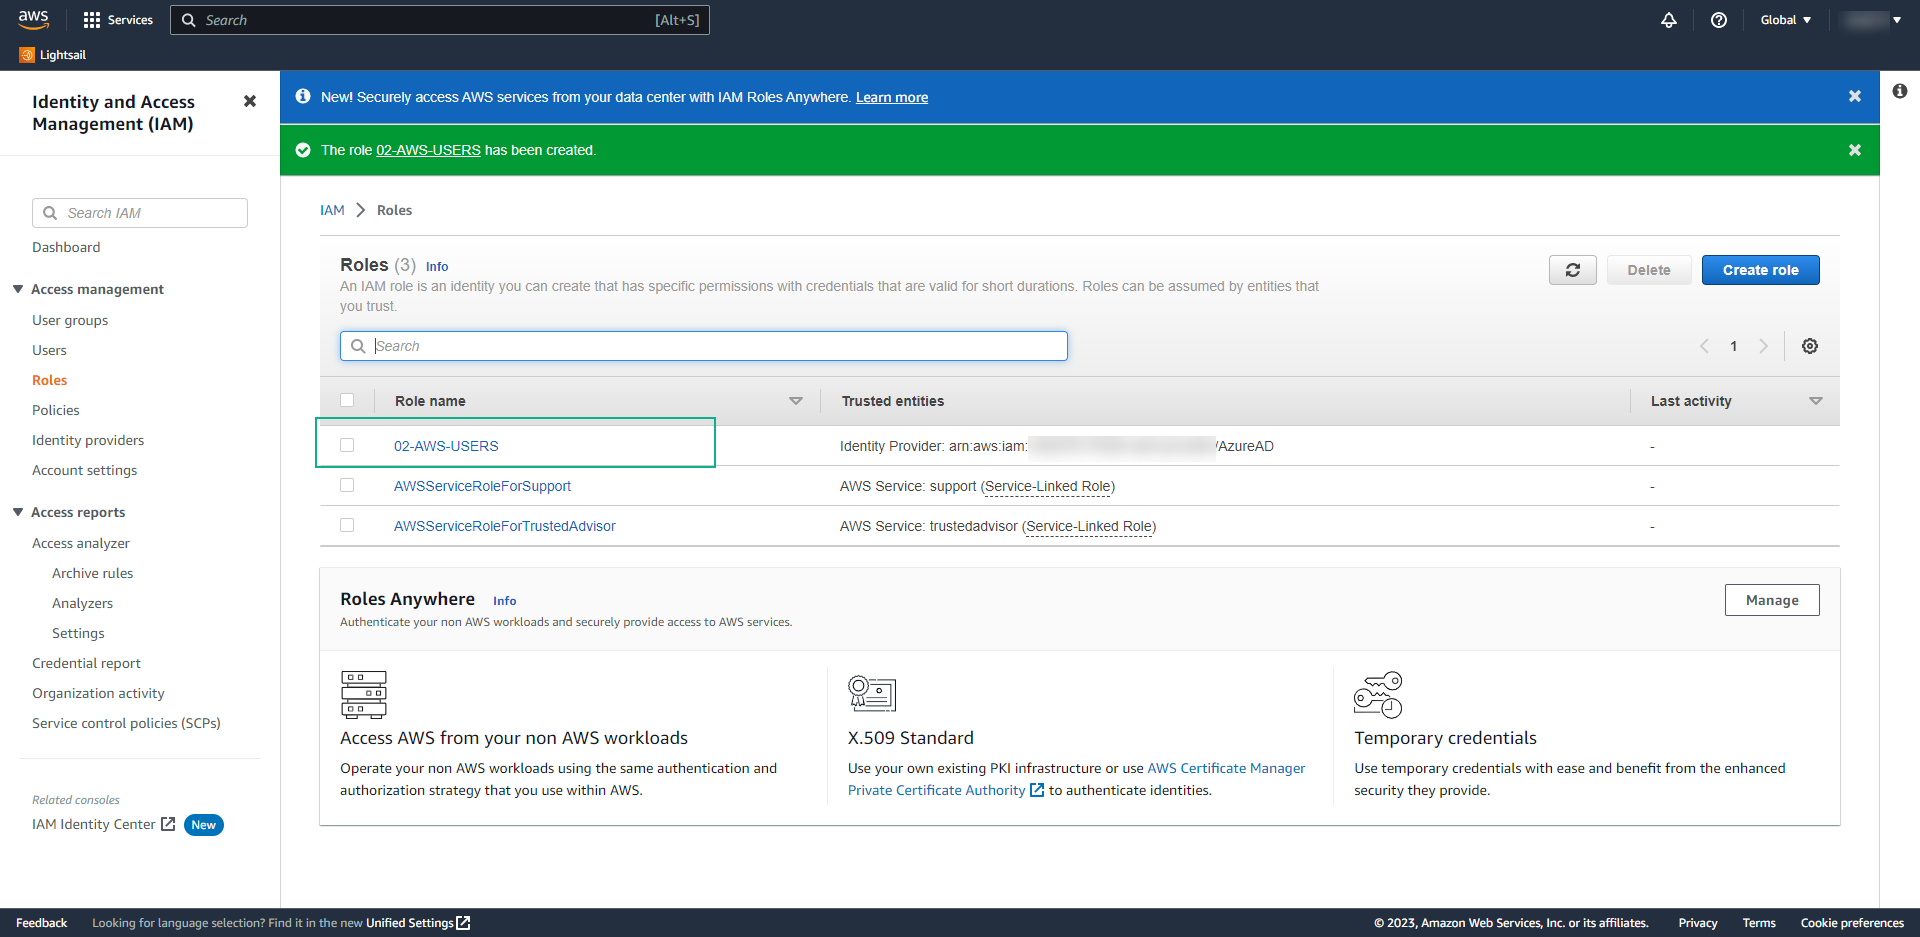
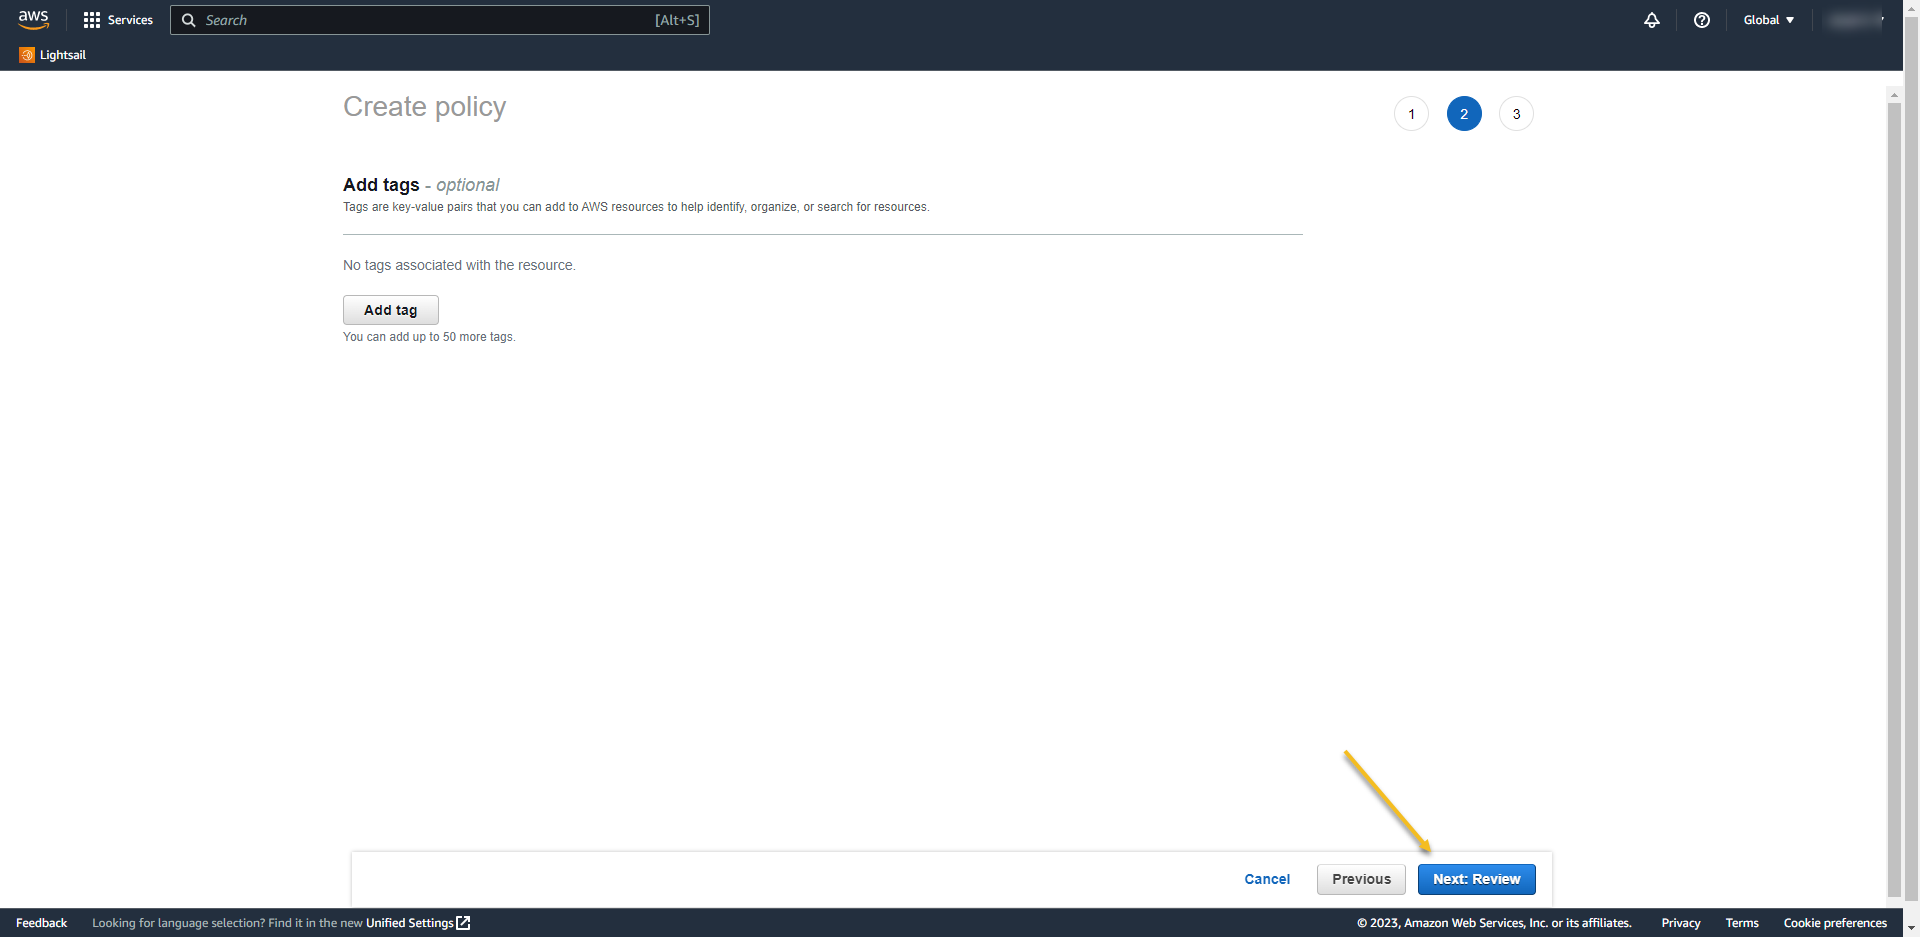
- Now we need to create a new Policy.
- Select Policies from left menu
- and click on Create Policy:
- Change the view to JSON and paste the data below:
{
    "Version": "2012-10-17",
    "Statement": [
        {
            "Effect": "Allow",
            "Action": [
            "iam:ListRoles"
            ],
            "Resource": "*"
        }
    ]
}
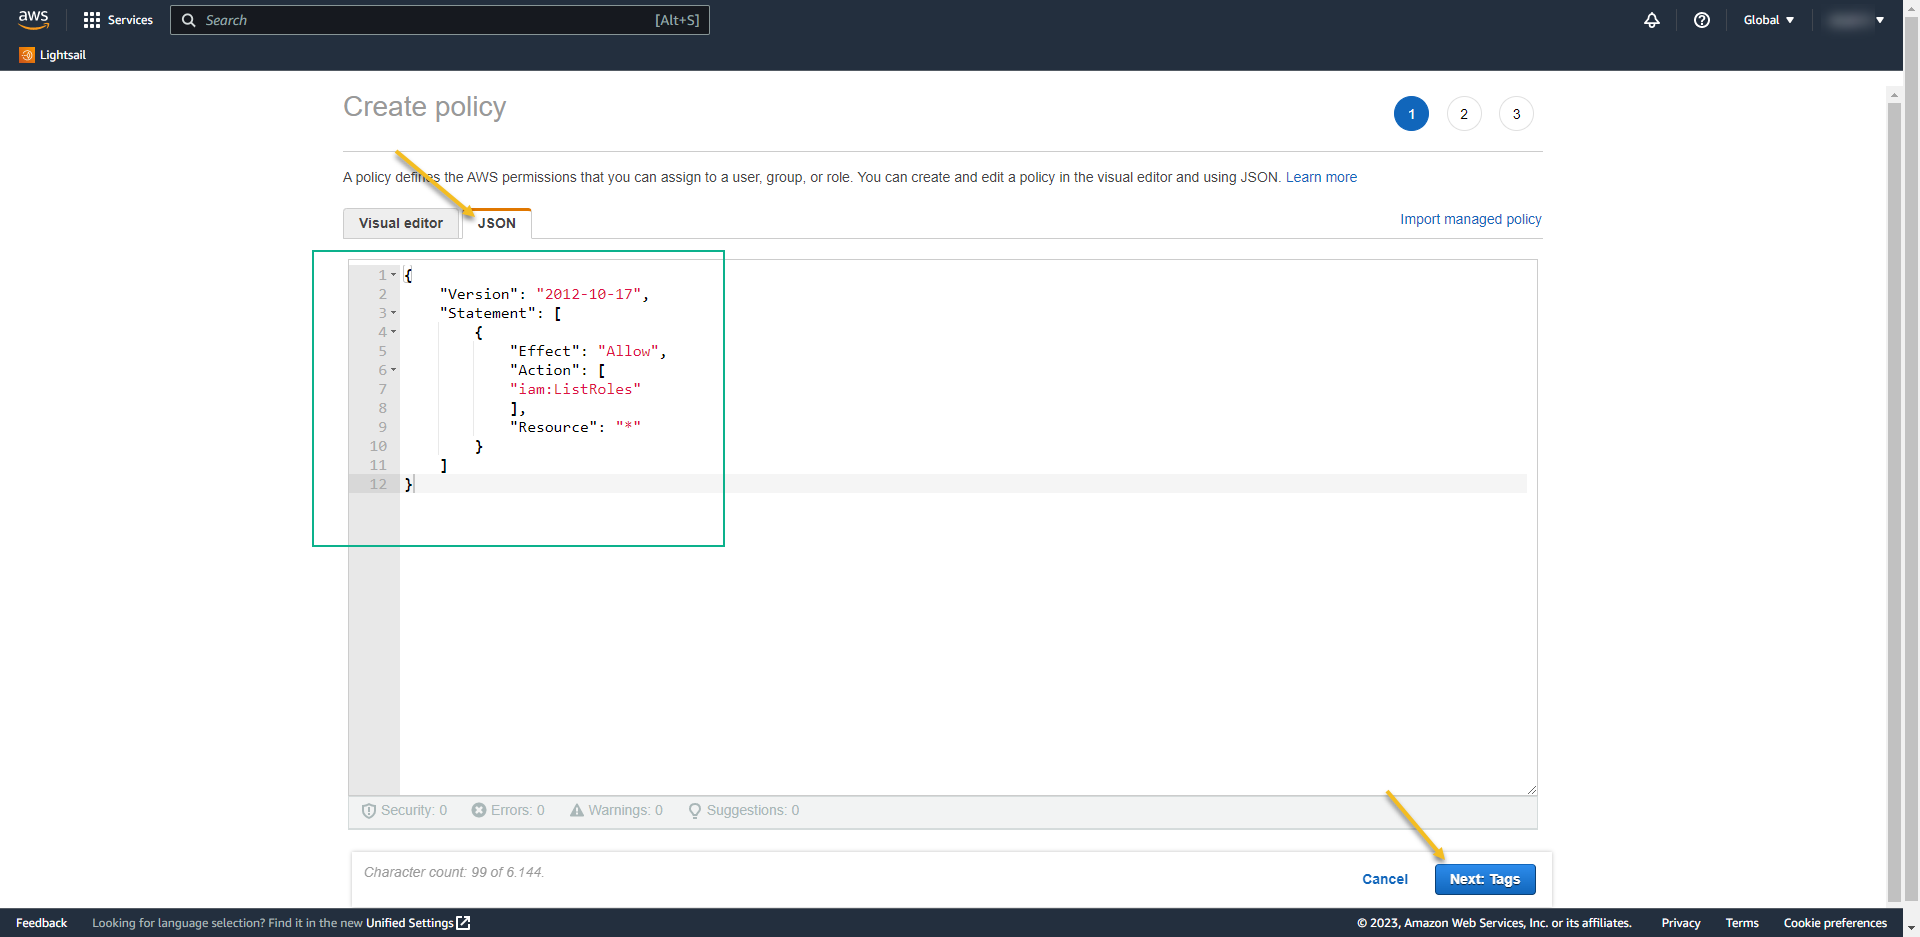
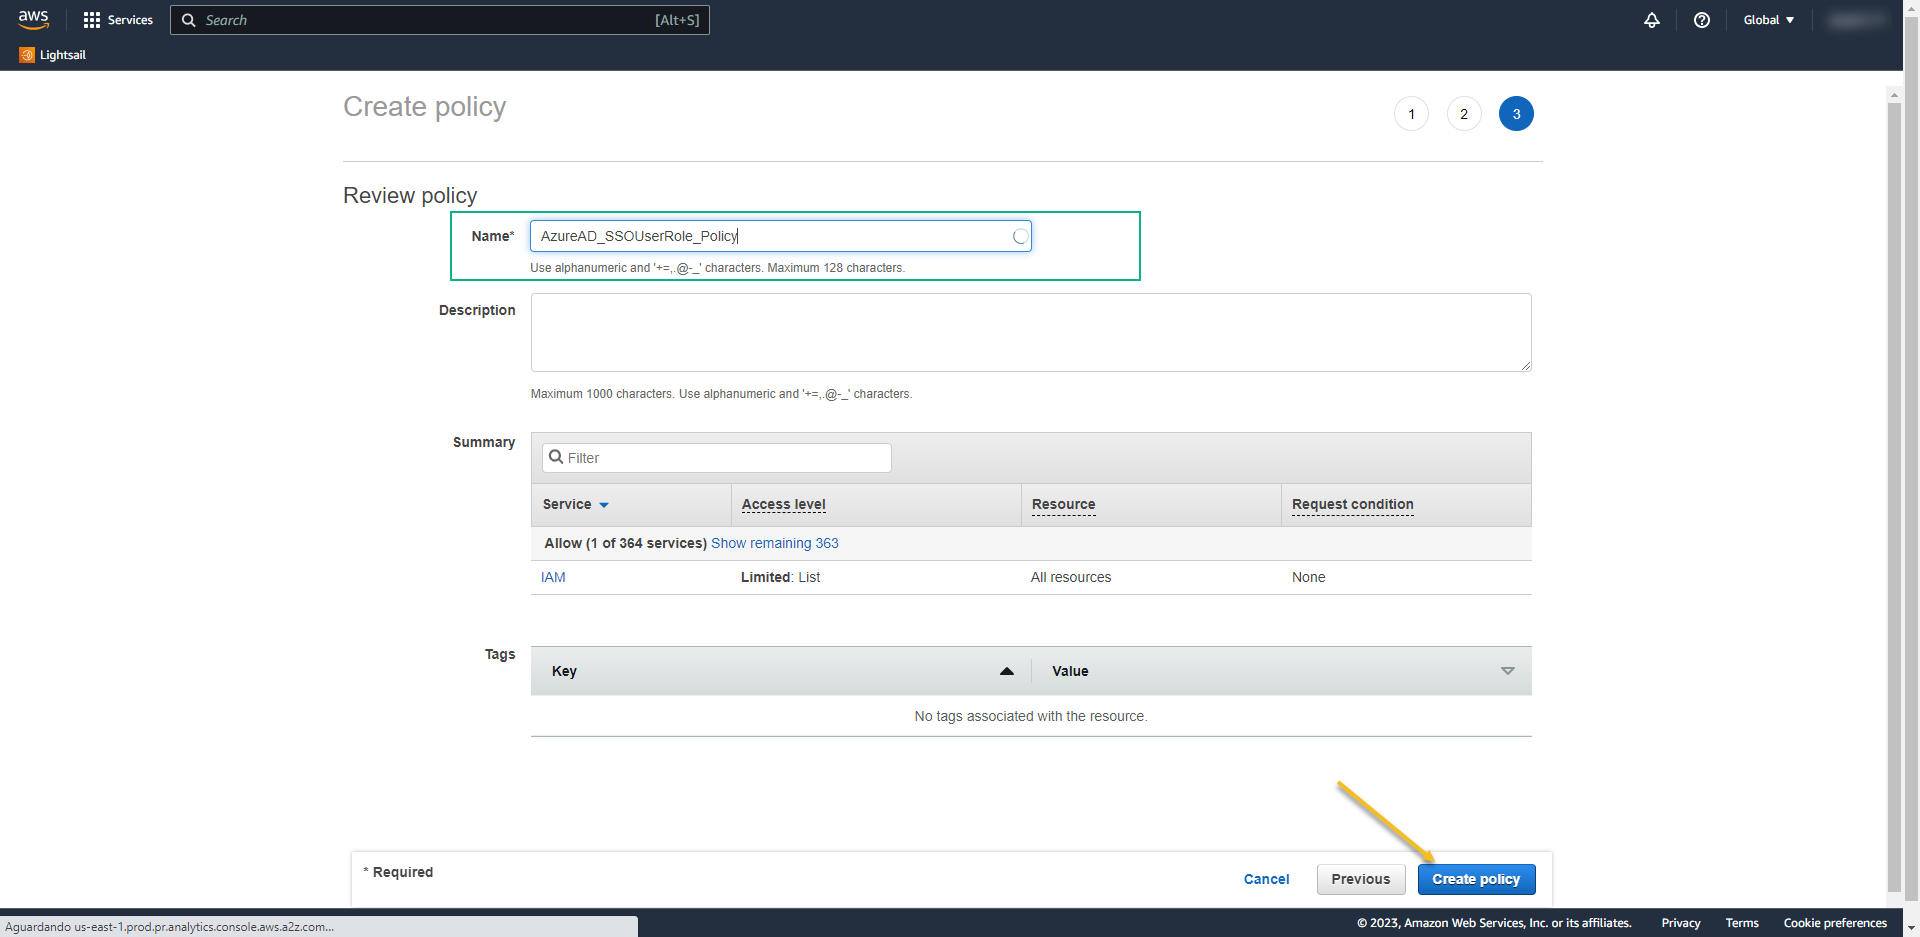
- Policy Name: AzureAD_SSOUserRole_Policy
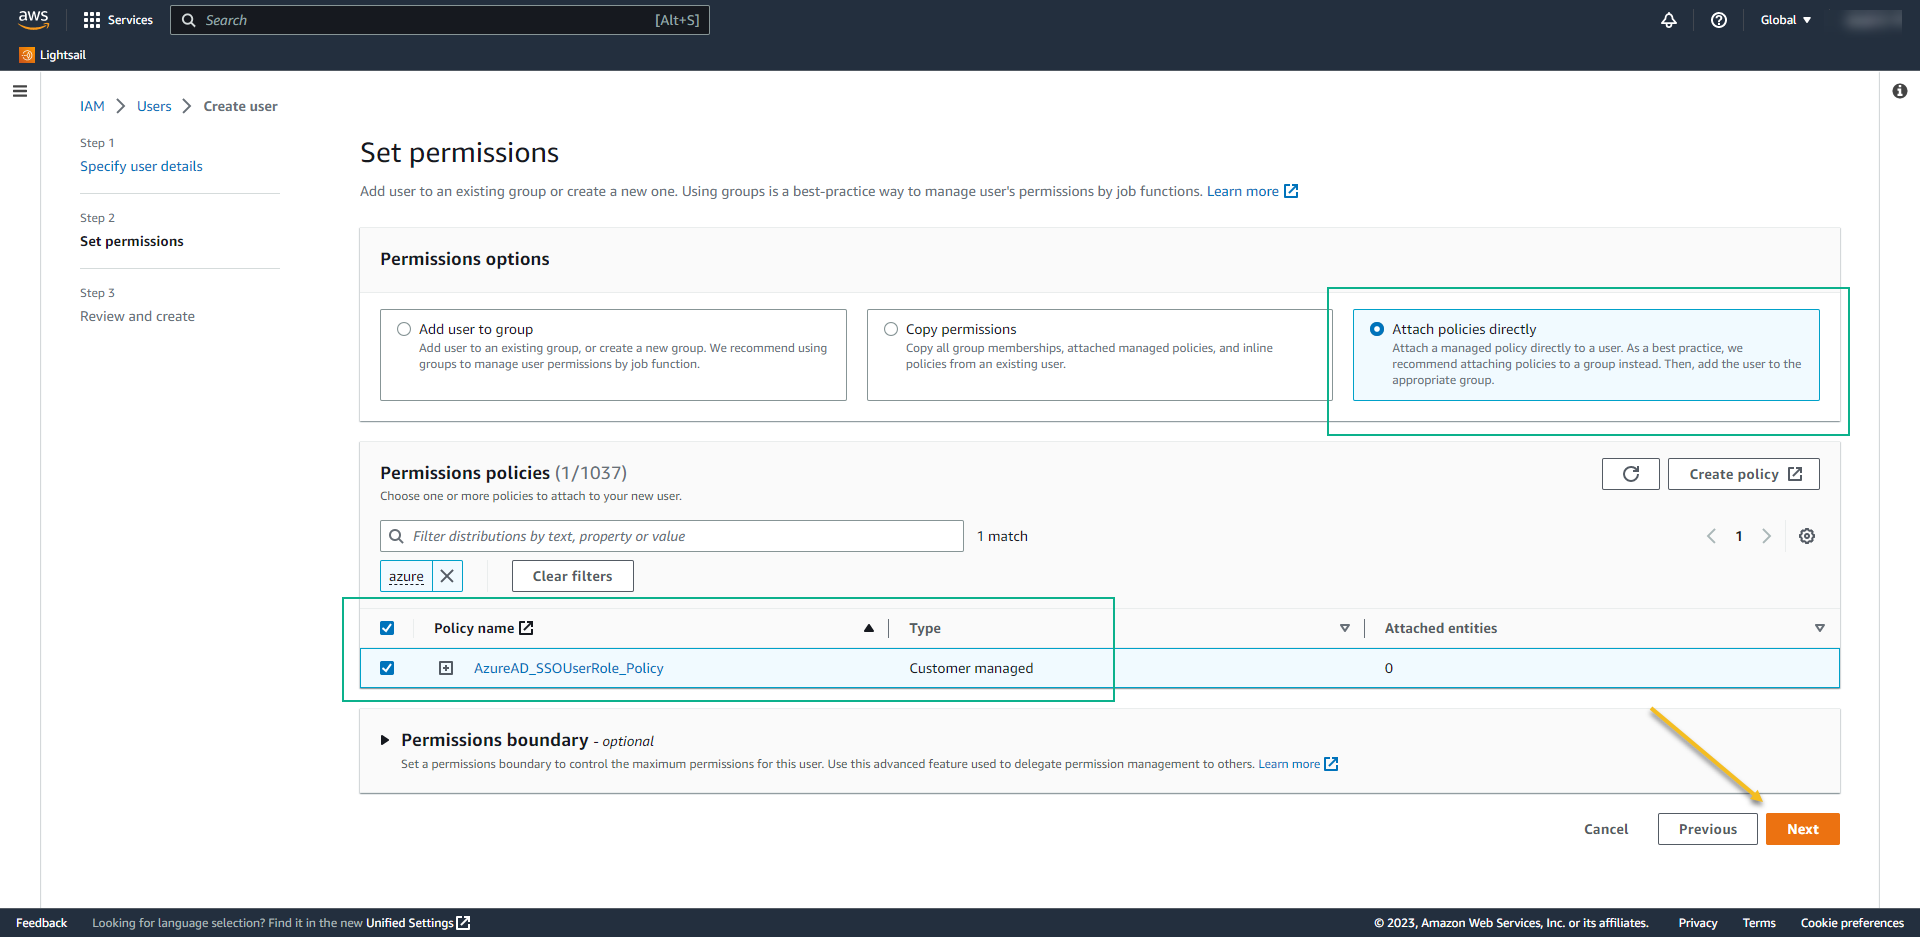
- Now we need to create a user with API access.
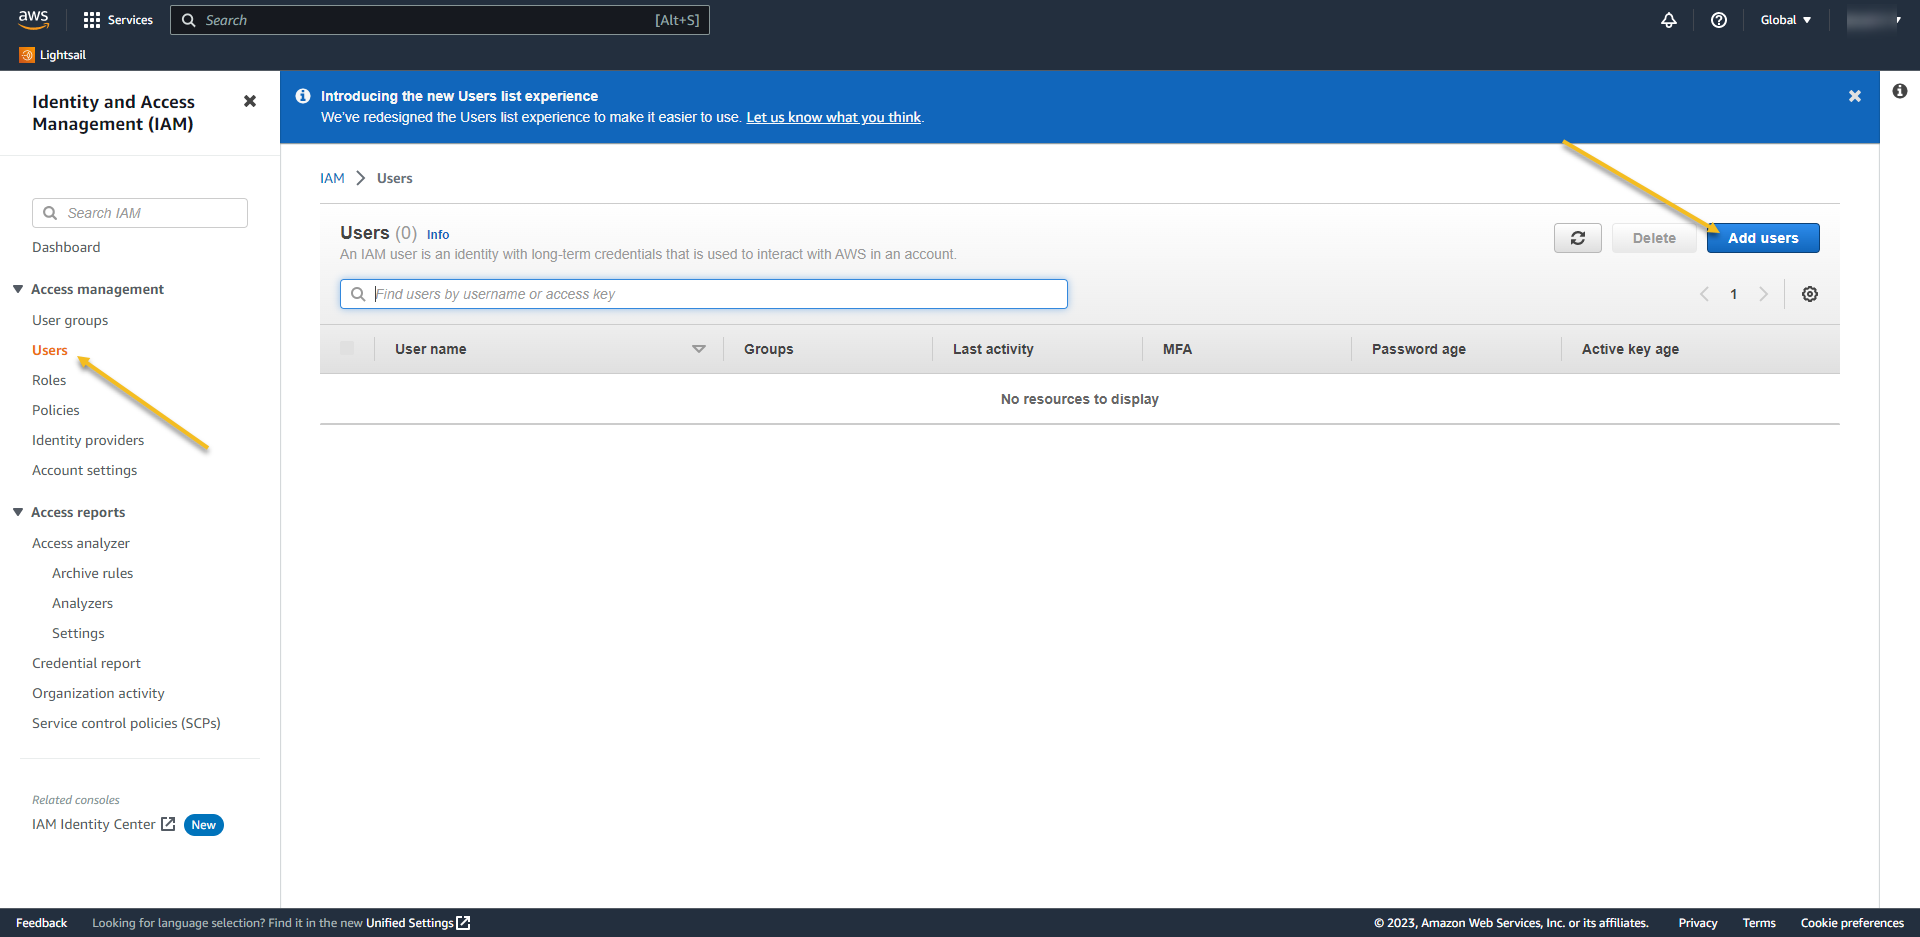
- On left menu click on Users and ADD USERS
- User name: AzureADRoleManager
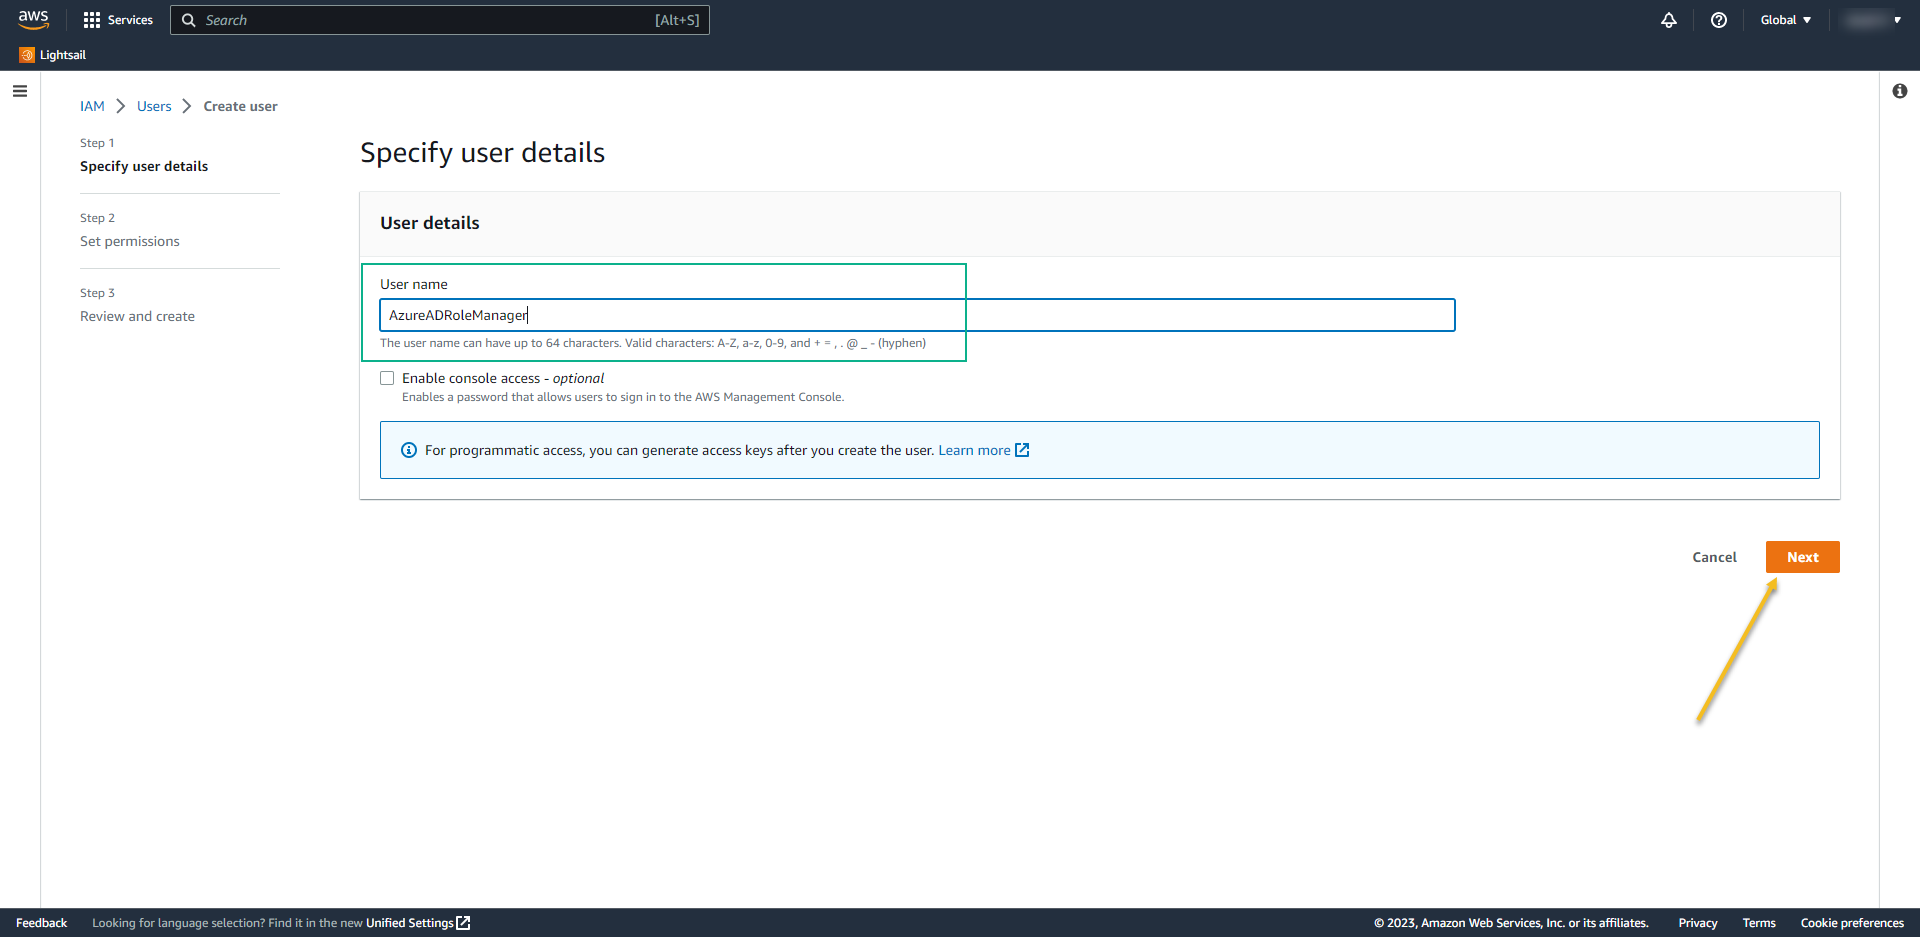
- Permission options: Attach policies directly
- Select the policy that we created before: AzureAD_SSO_user_role_Policy

- Click on next to review and create.
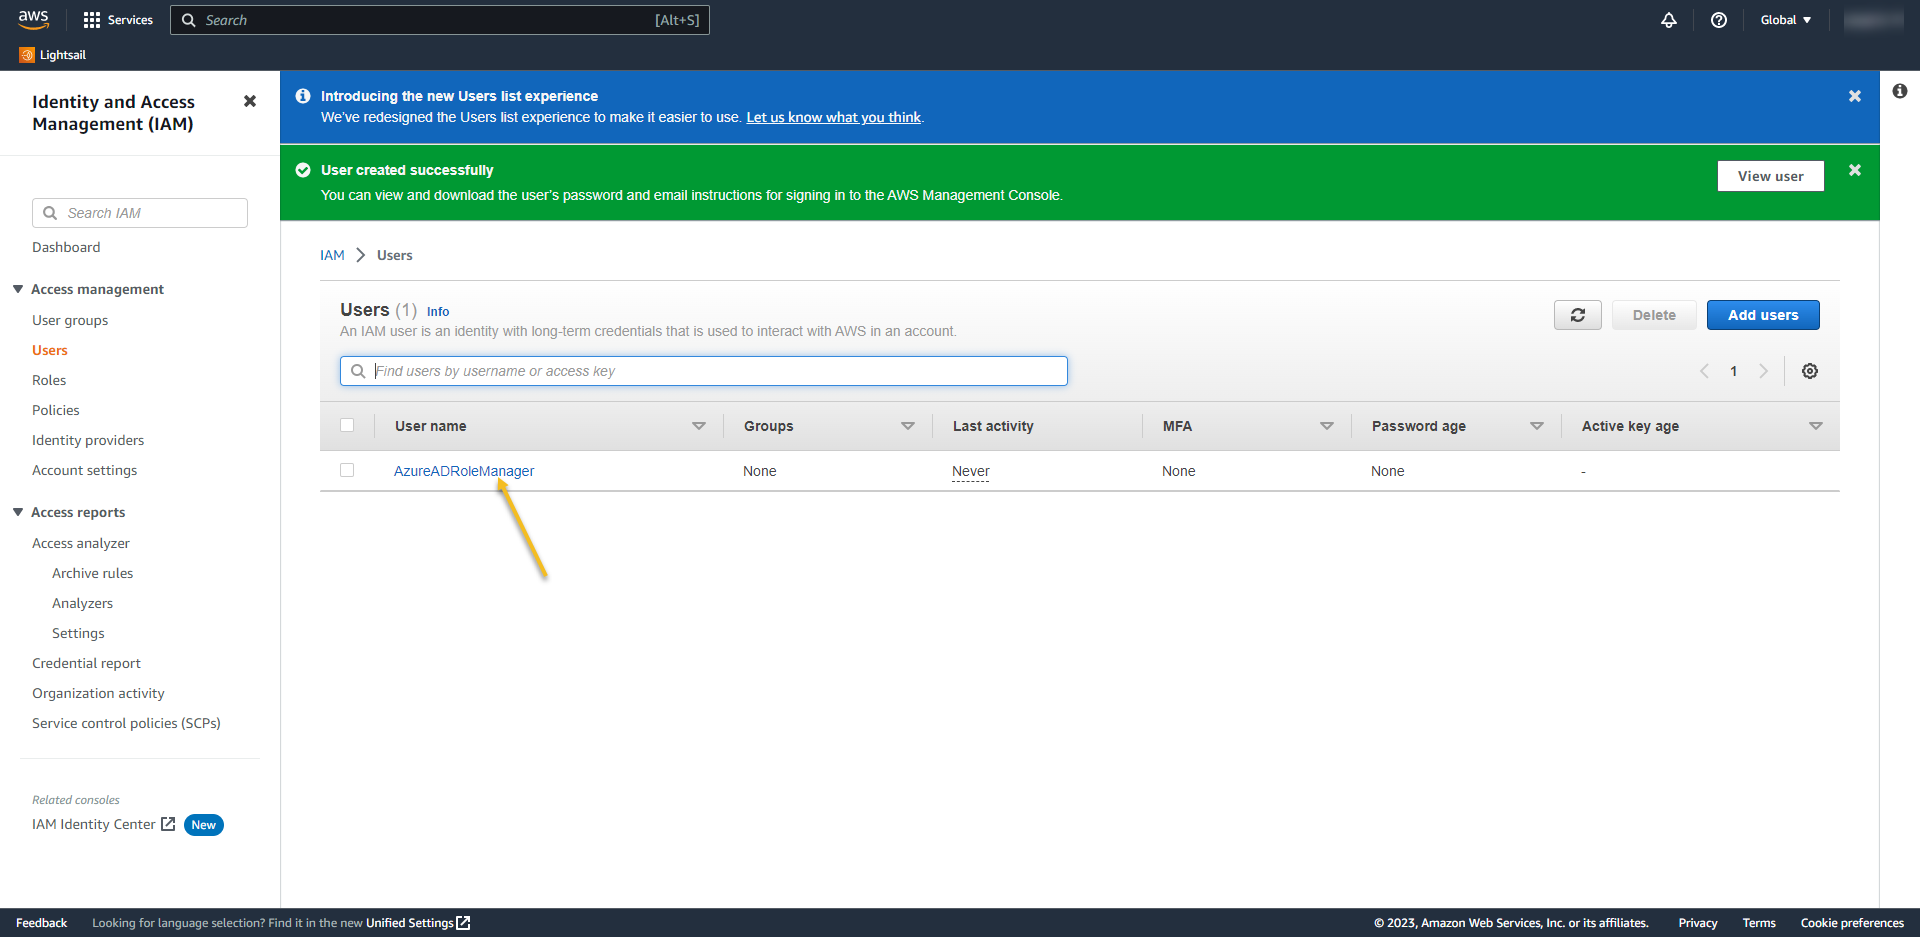
- Access the new user again
- Go to Security Credentials and click on Create Access Key
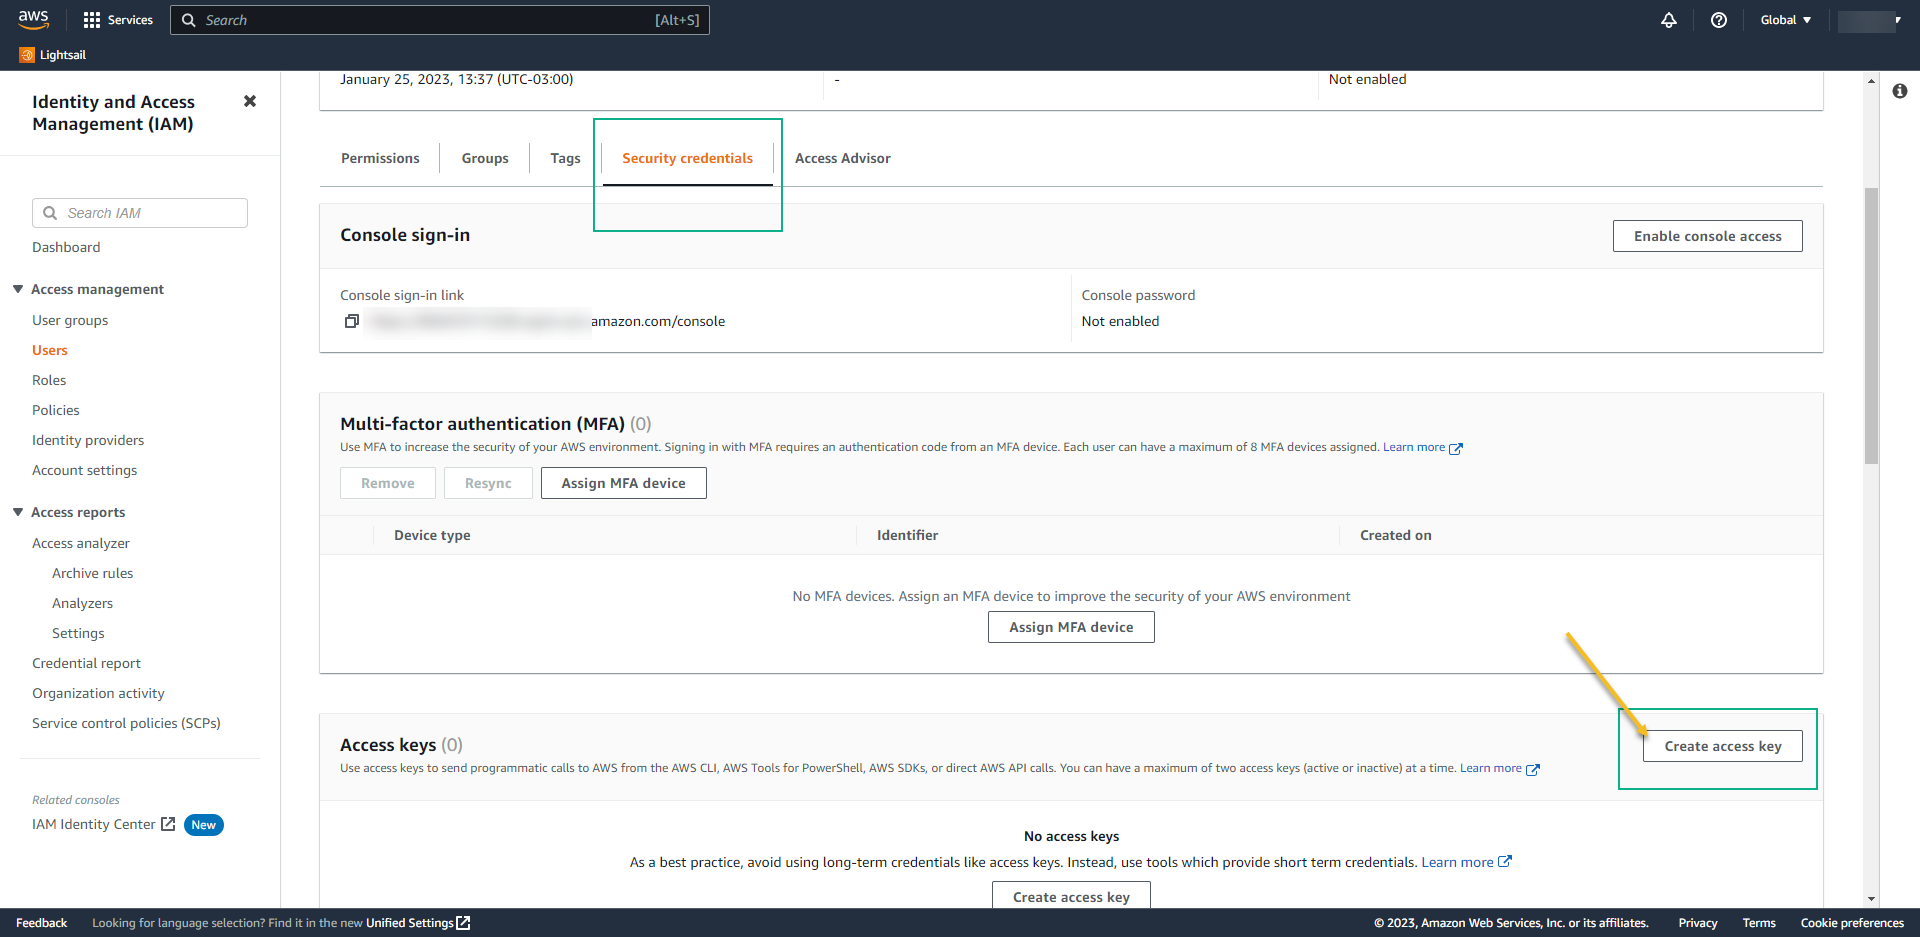
- Select the use case Other
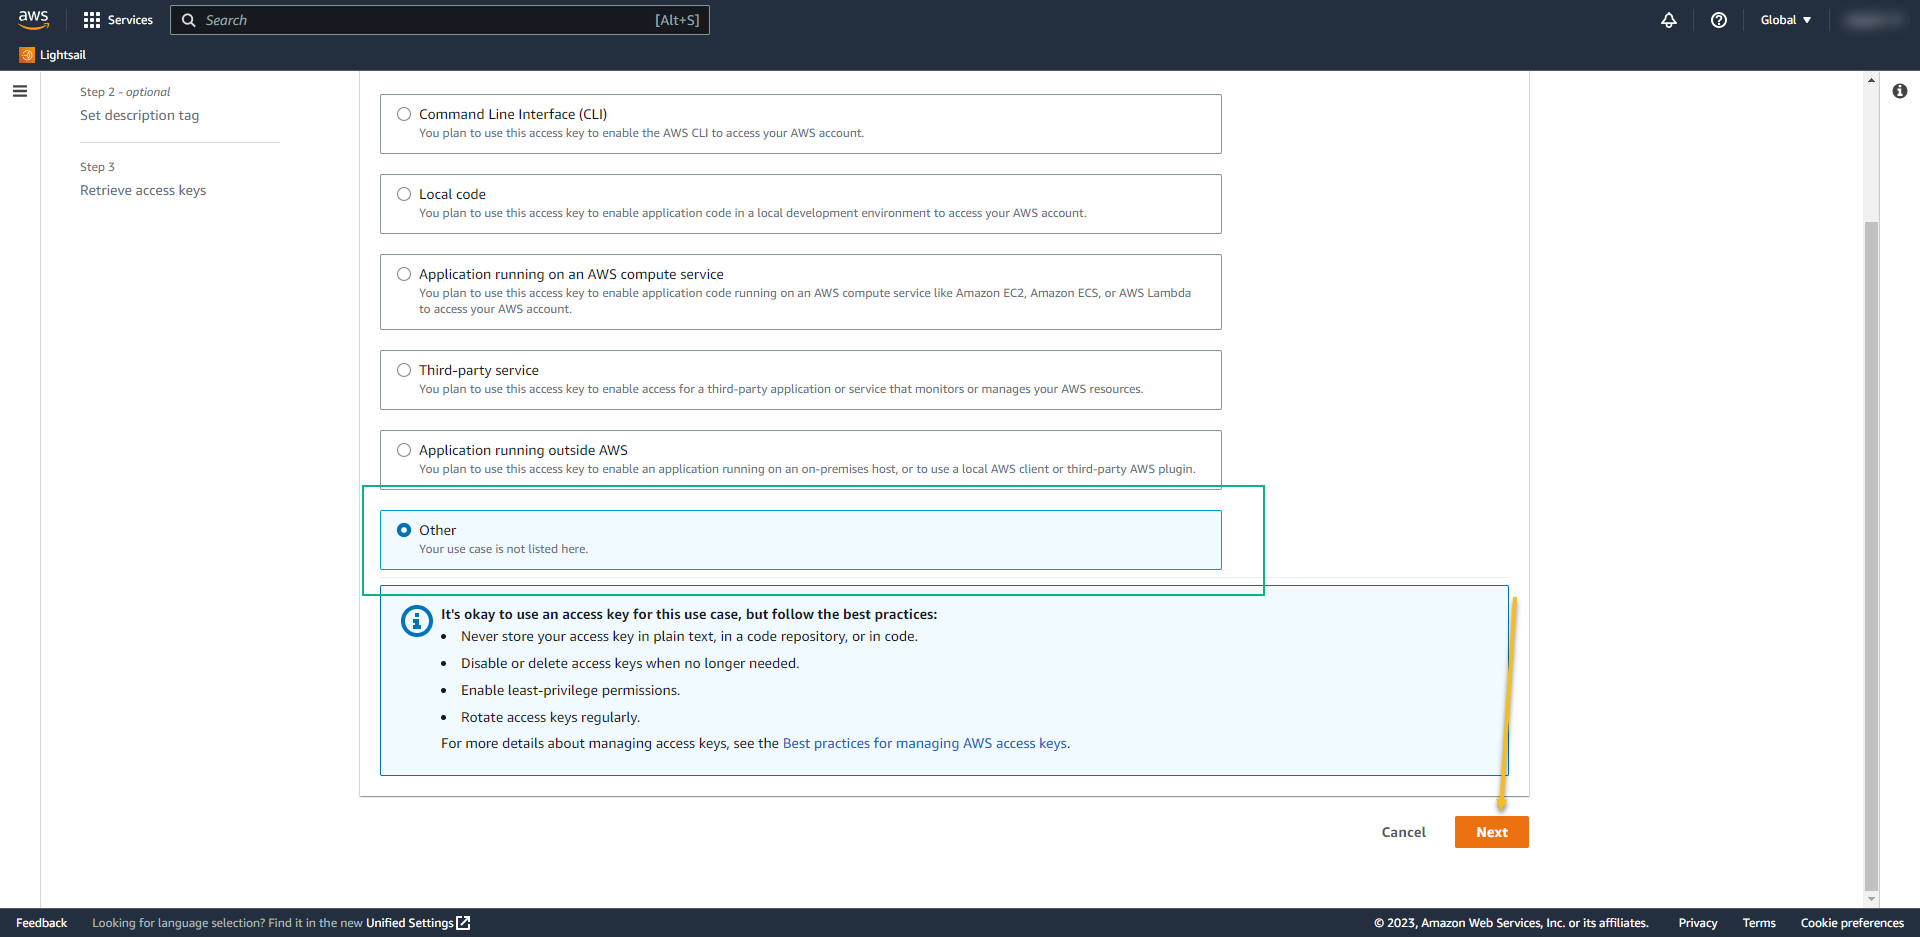
- Click on Create Access Key
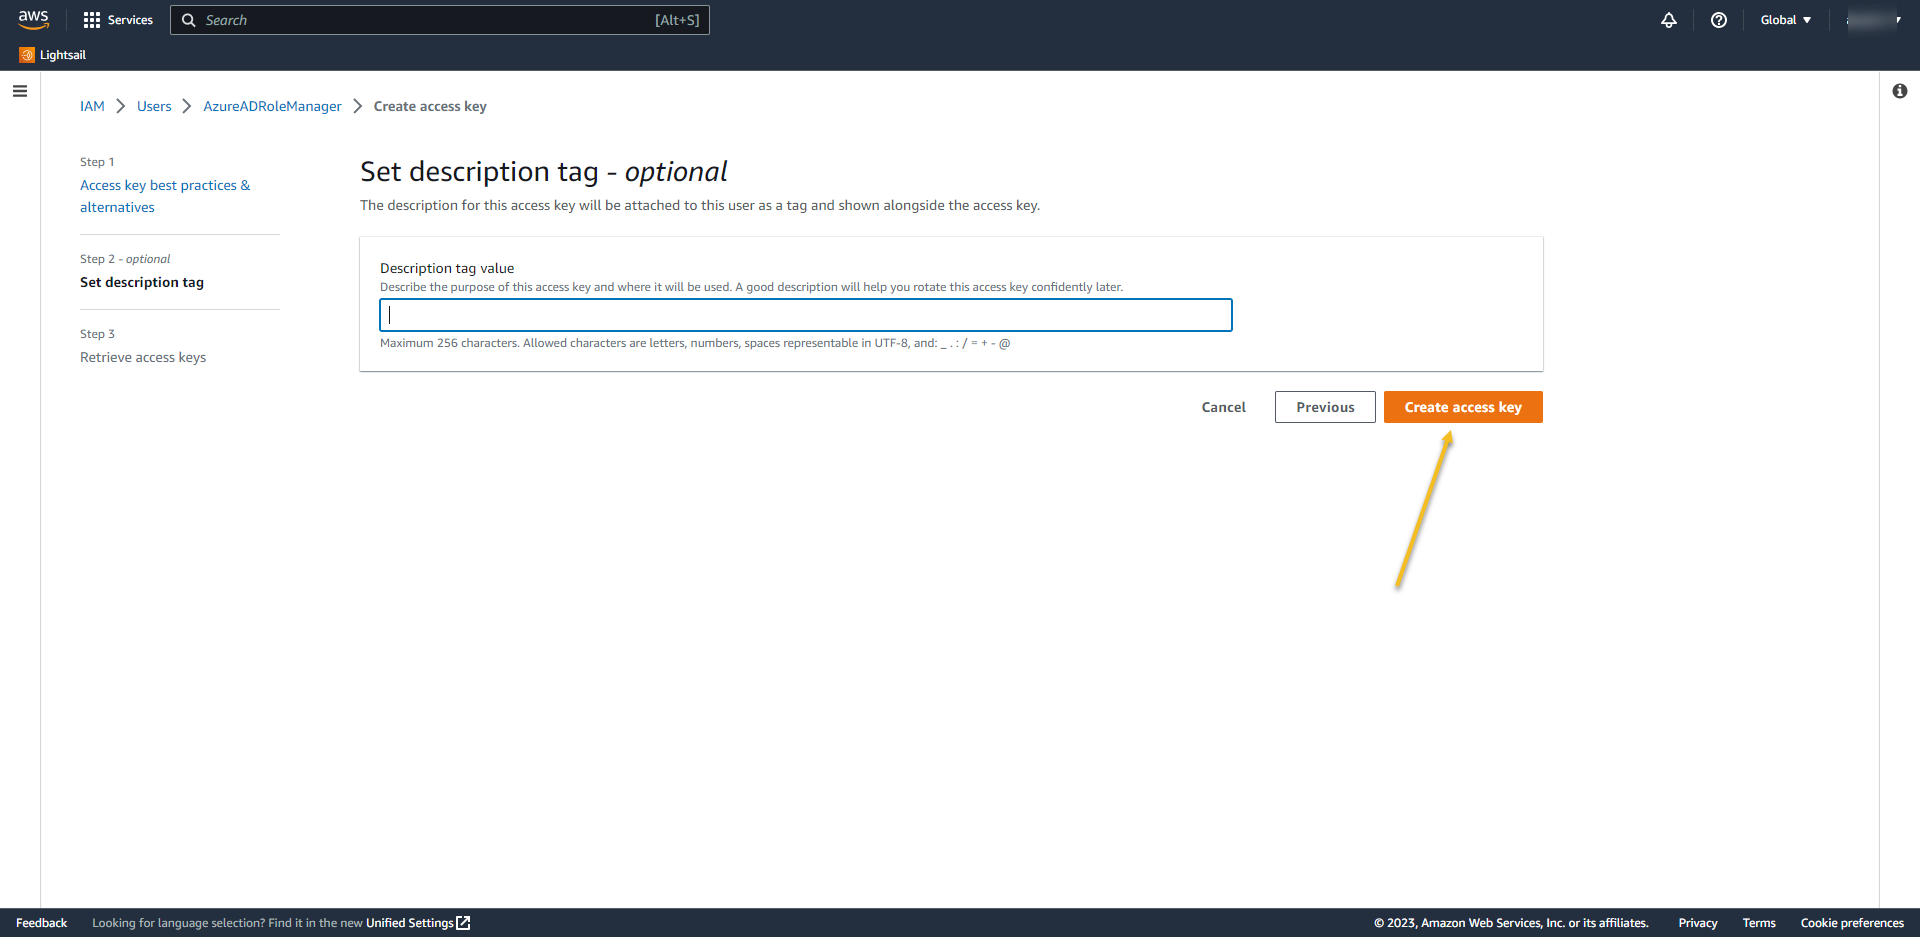
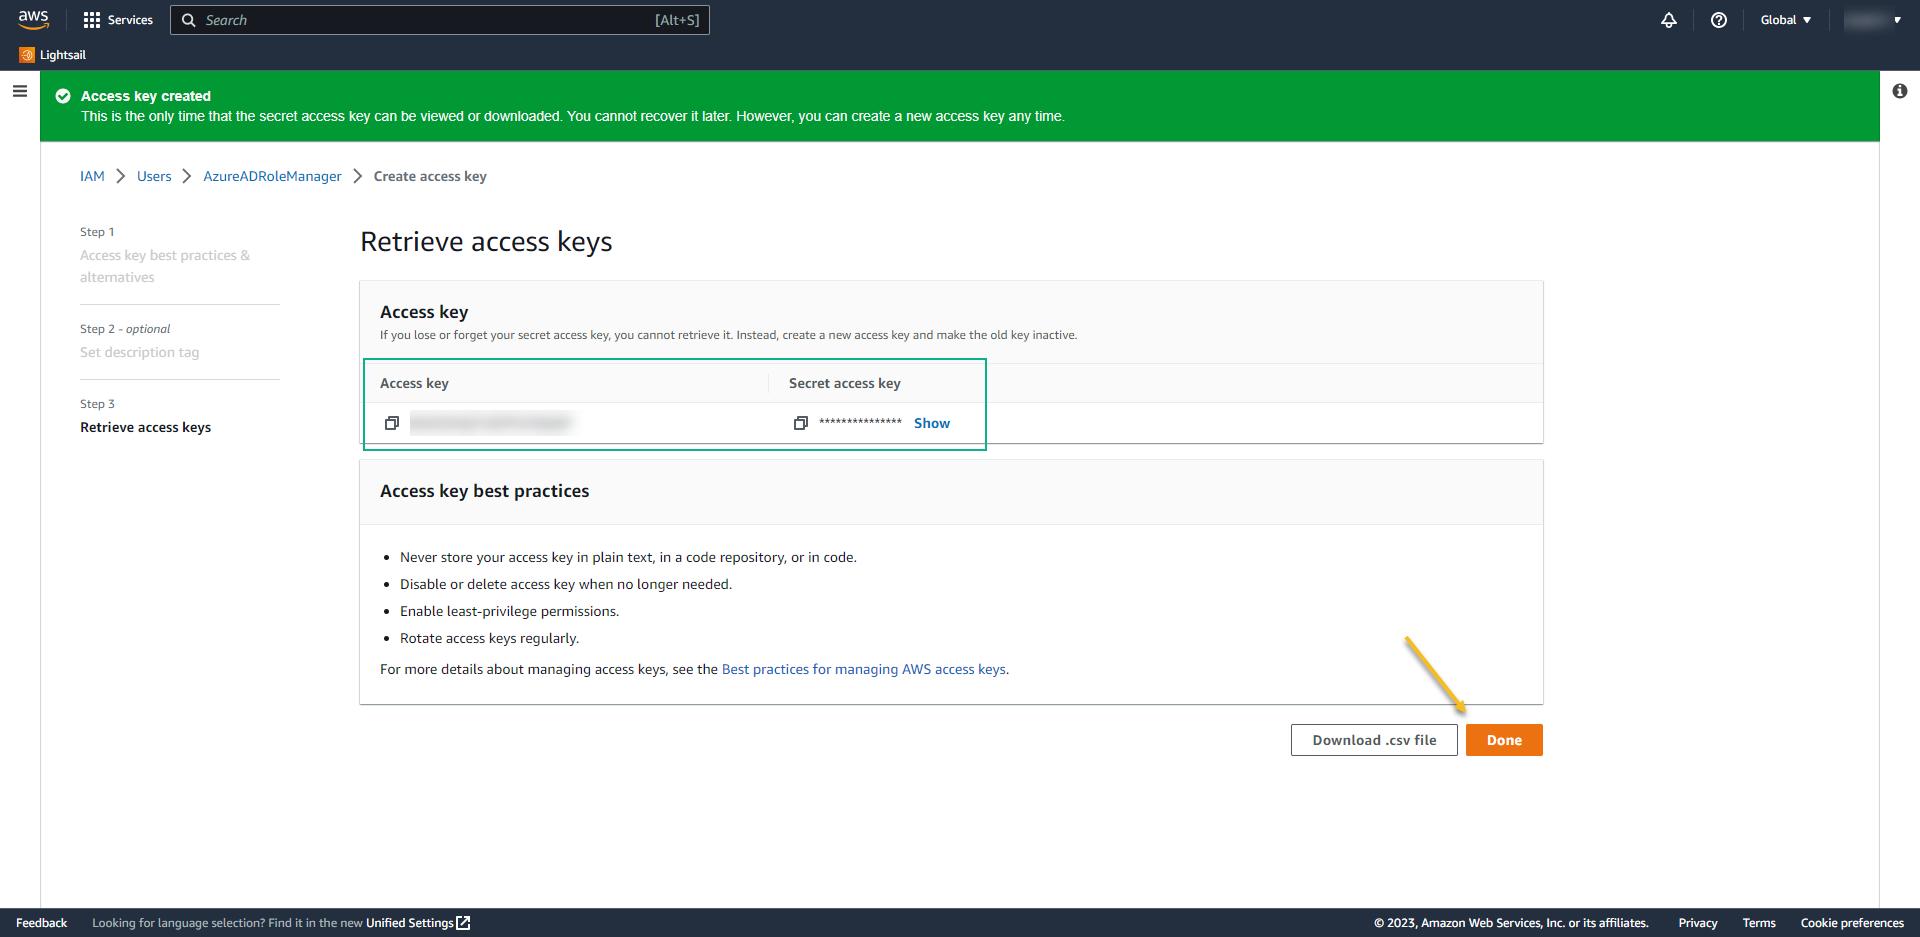
- At the next screen, take note of the Access Key and Secret Access Key. We´ll use it back on Azure AD.
AZURE
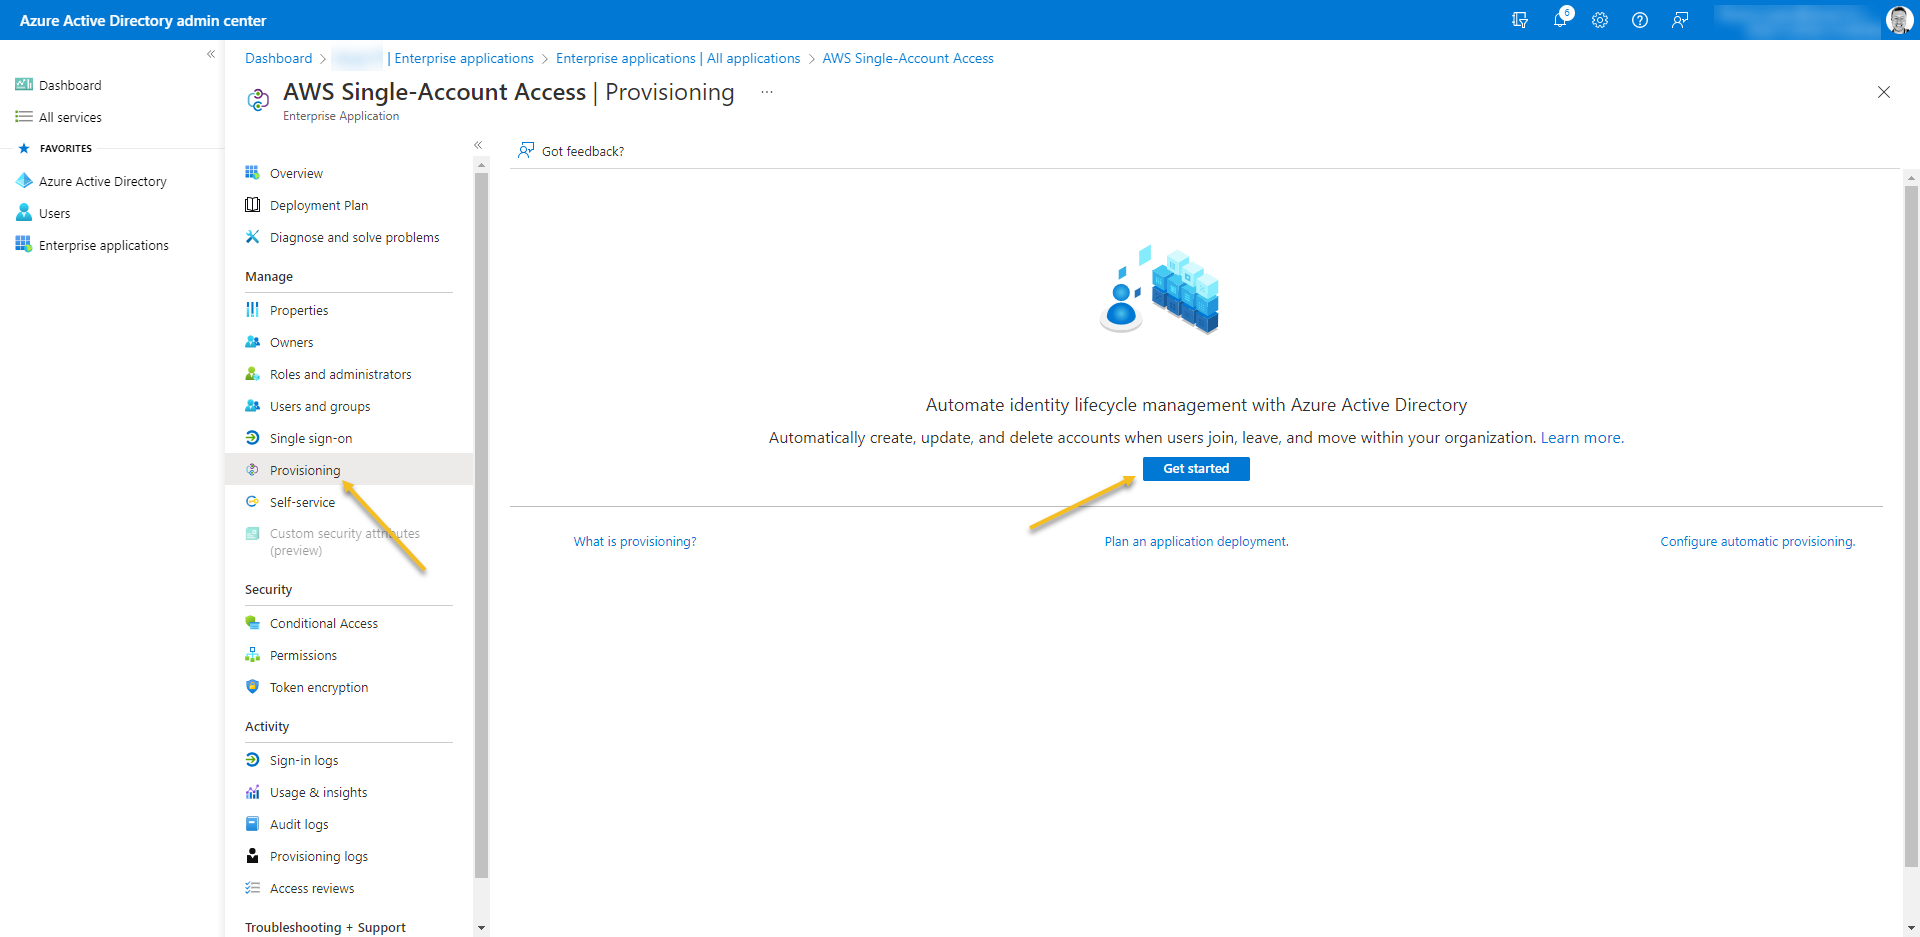
- Back to Azure -> Access the Enterprise Application and open the app AWS Single-Account Access
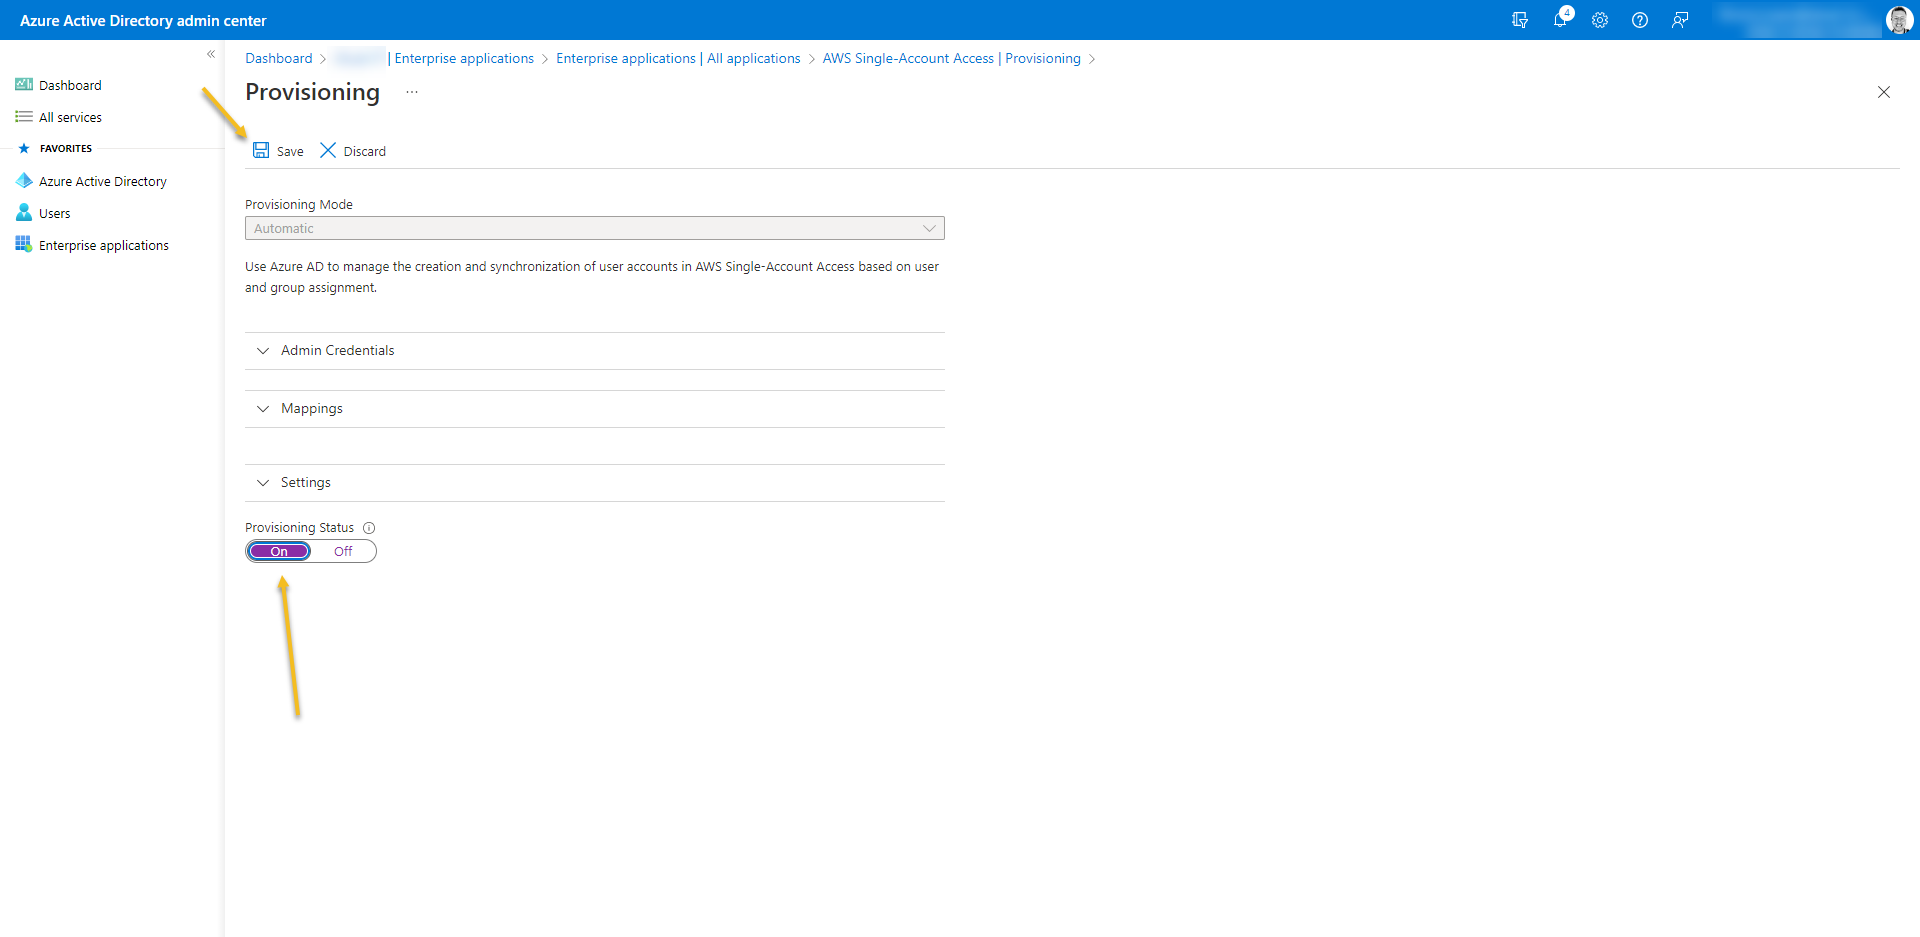
- Go to Provisioning -> Get- started
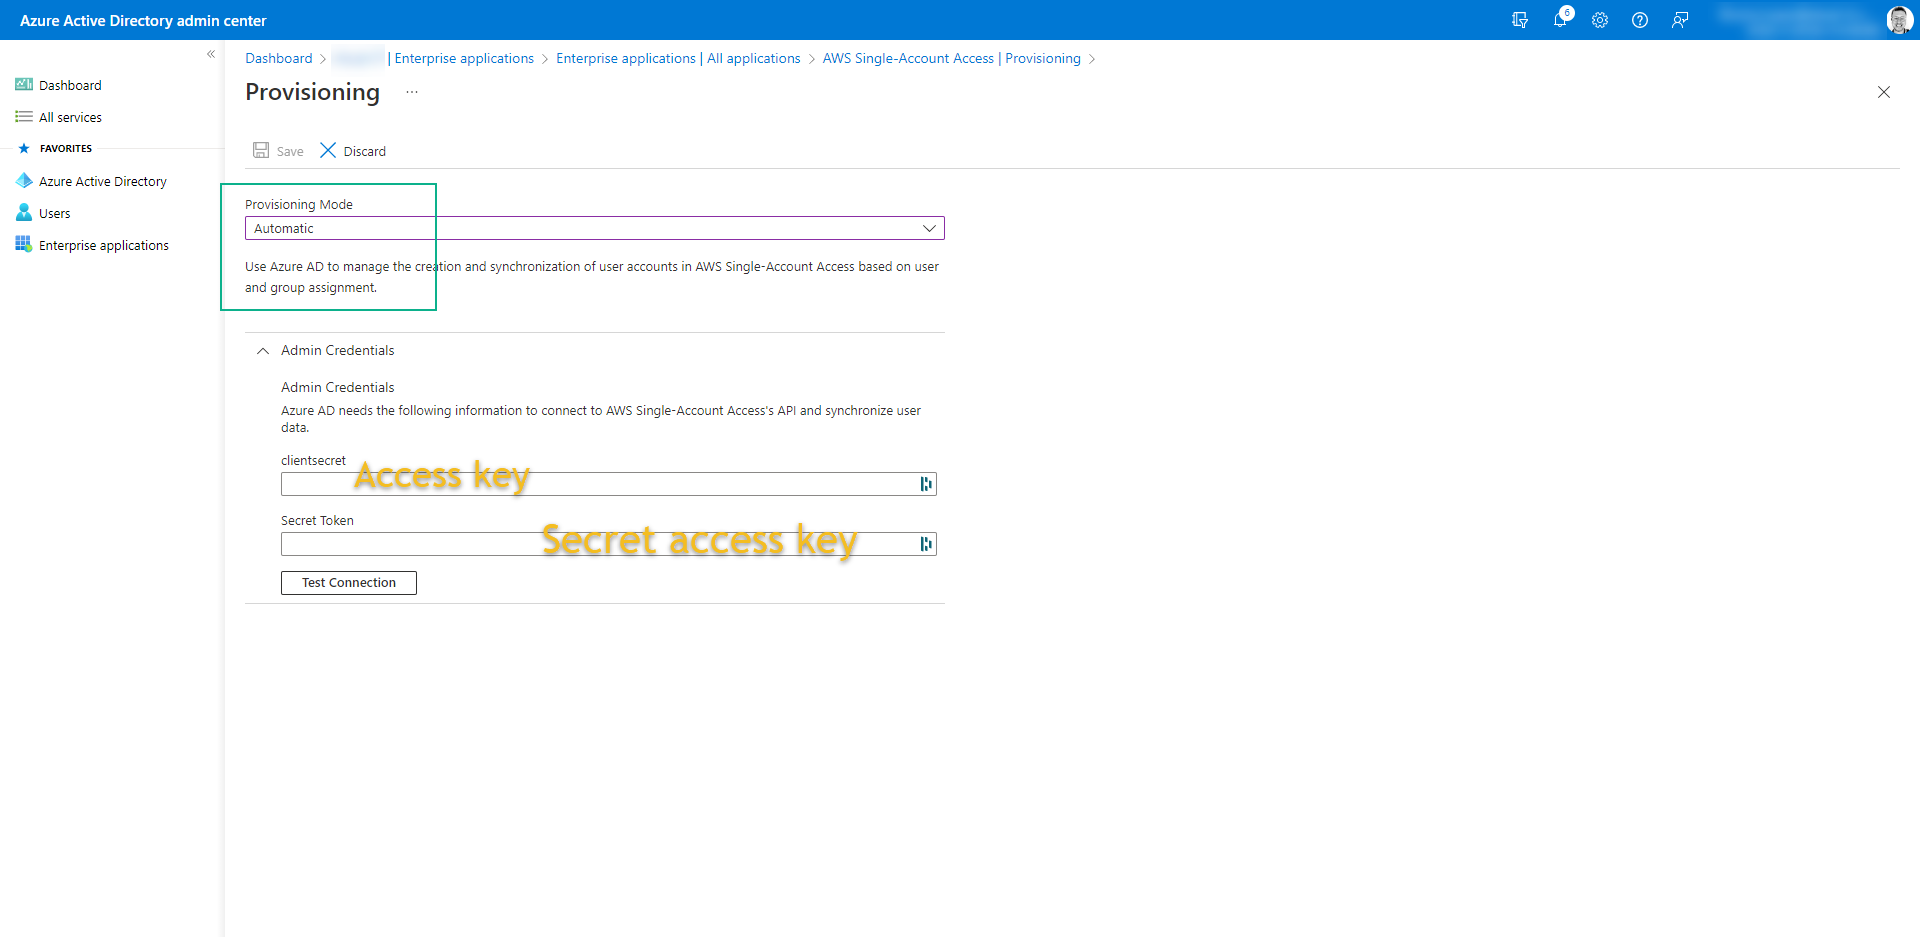
- Change the Provisioning Mode: Automatic
- Admin Credentials:
- clientsecret: AWS-ACCESS-KEY
- Secret Token: AWS-SECRET-ACCESS-KEY
- Both you get from user that you create on AWS
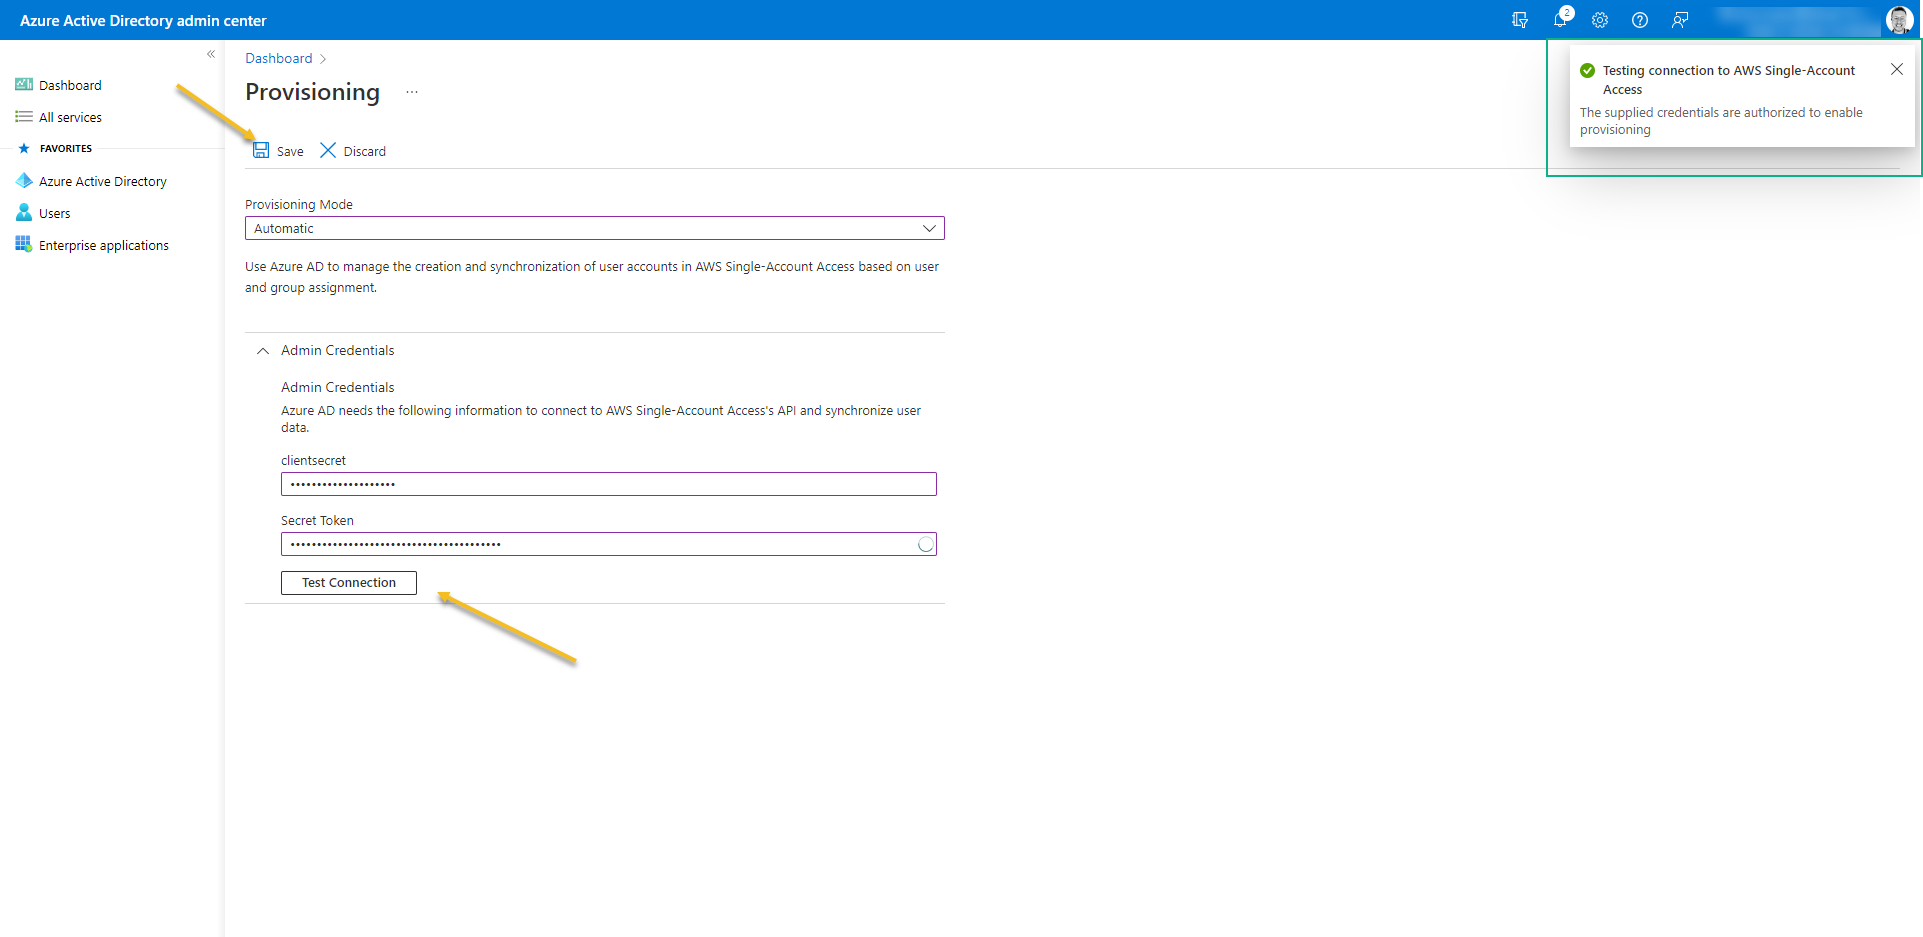
- Click on Test Connection -> Save
- Go out from the Provisioning screen and access again – It´s necessary just to refresh the page.
- Now click on Edit Provisioning
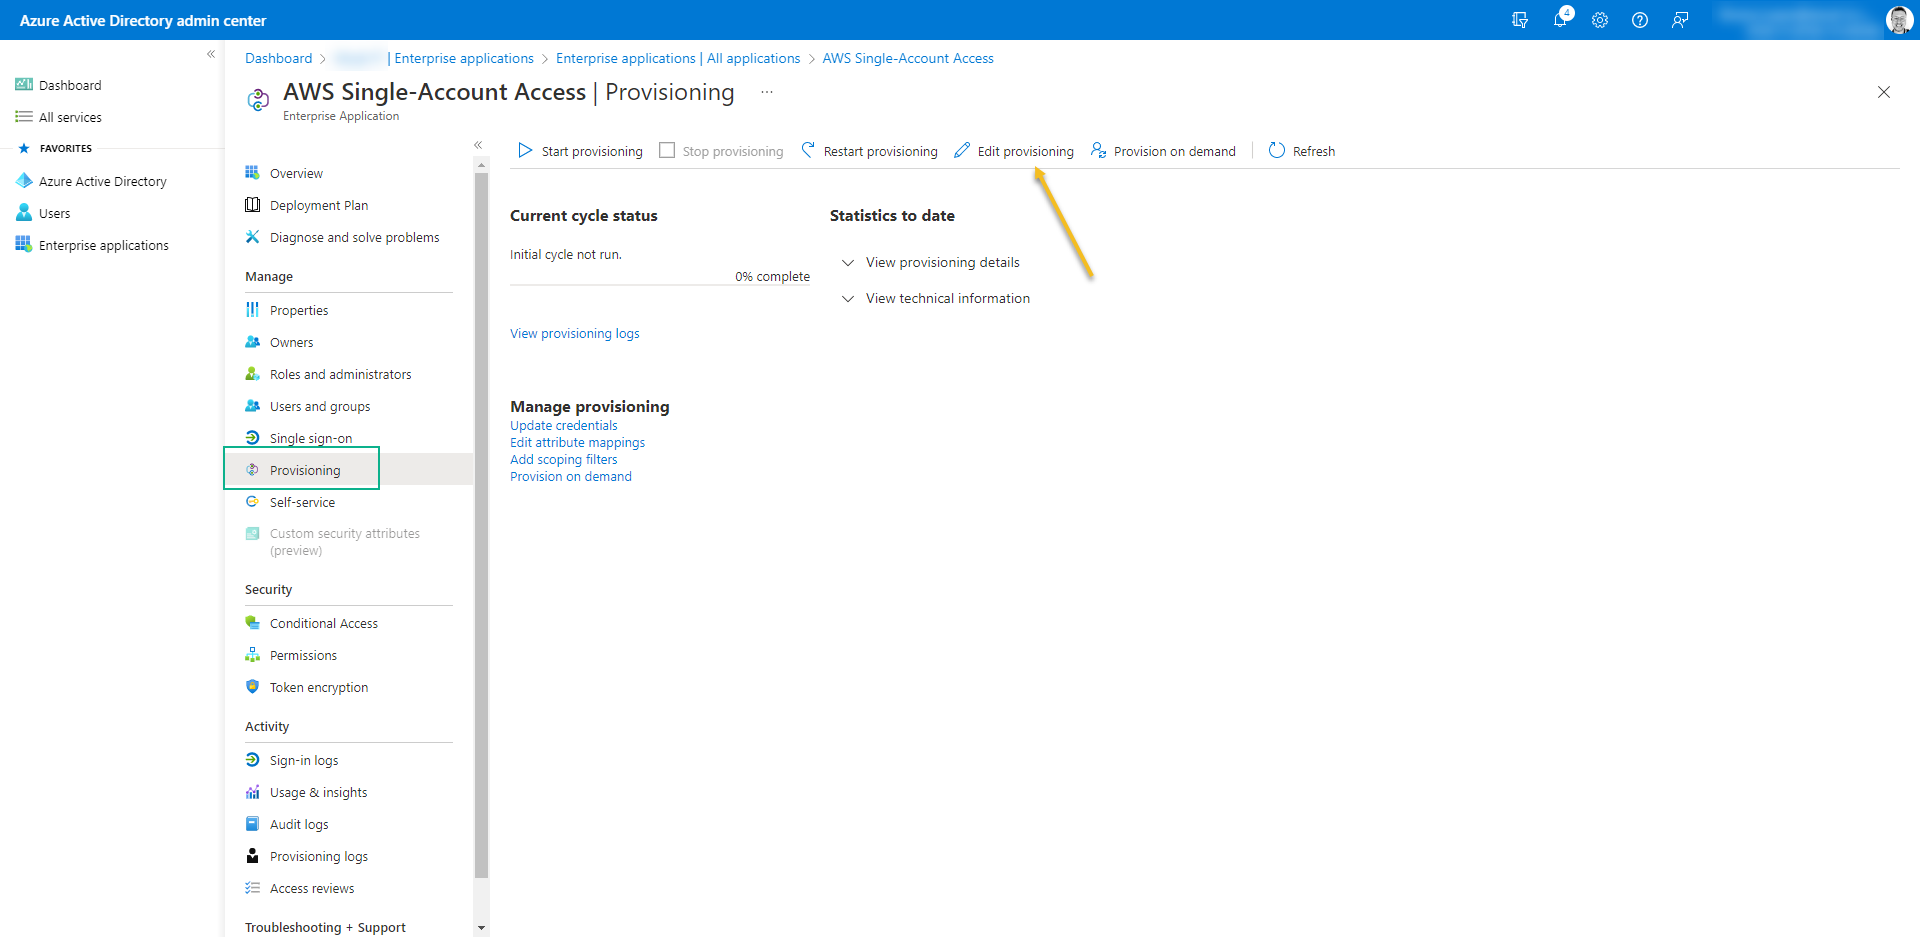
- Turn on Provision Status
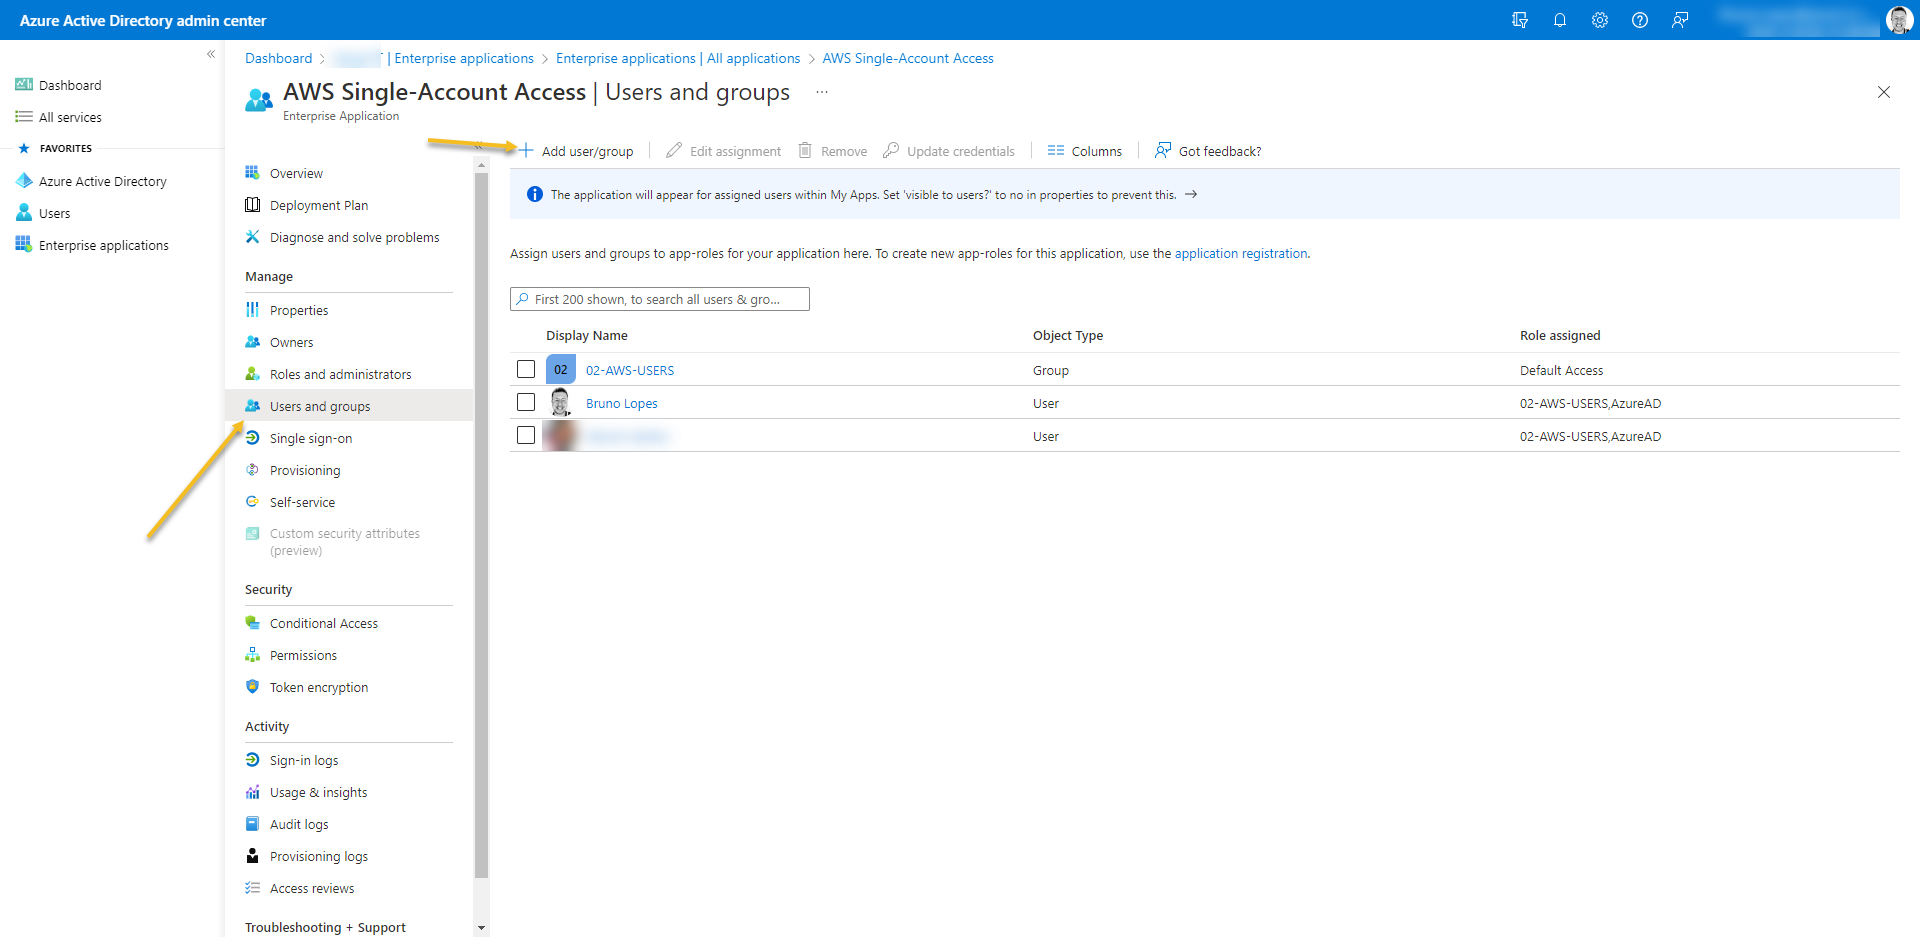
- At last, Go to Users and Groups from the enterprise application and add who is going to have access.
- If you don´t have Azure AD Premium you cannot add a GROUP here.
- The users must be members of the security group even if it is added manually at Users and Groups from the enterprise application.
- The security group must be direct members
- You must wait the provision time of synchronization (could take up to 40min)
- To test, access the: https://myapplications.microsoft.com/ end click on AWS icon